20+ Years Experience
Specialist Concrete Repair

Enquire Today For A Free No Obligation Quote
Paws and Floors: Is Epoxy Flooring a Good Choice for Dogs
The Impact of Flooring on Pets
Flooring plays a crucial role in creating a safe and comfortable environment for our beloved furry friends. The right flooring can significantly impact dogs’ health and well-being, providing a suitable surface for them to walk, play, and rest on. When it comes to choosing flooring for dogs, several factors need to be considered, such as durability, ease of cleaning, and paw and joint comfort.
What is Epoxy Flooring?
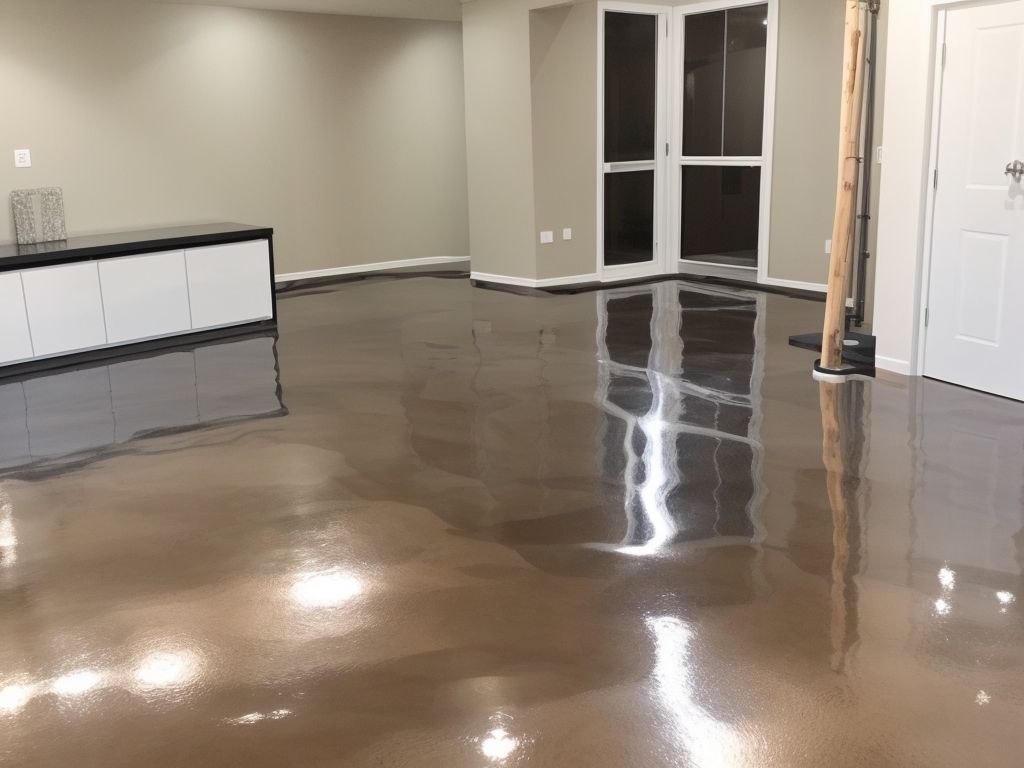
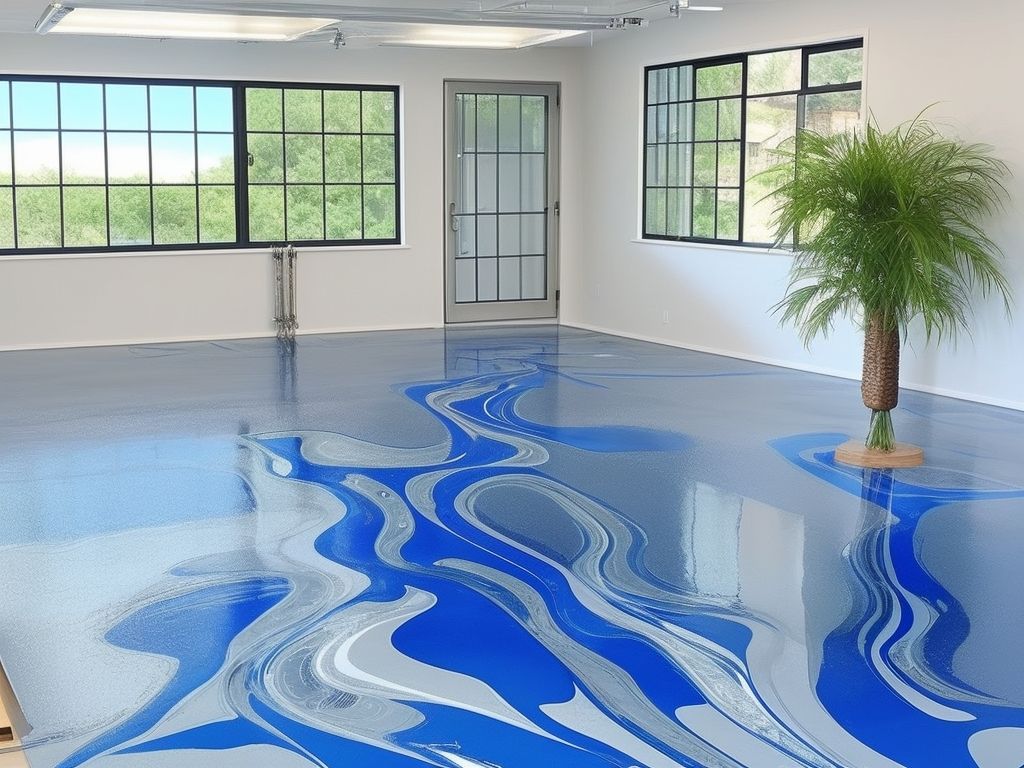
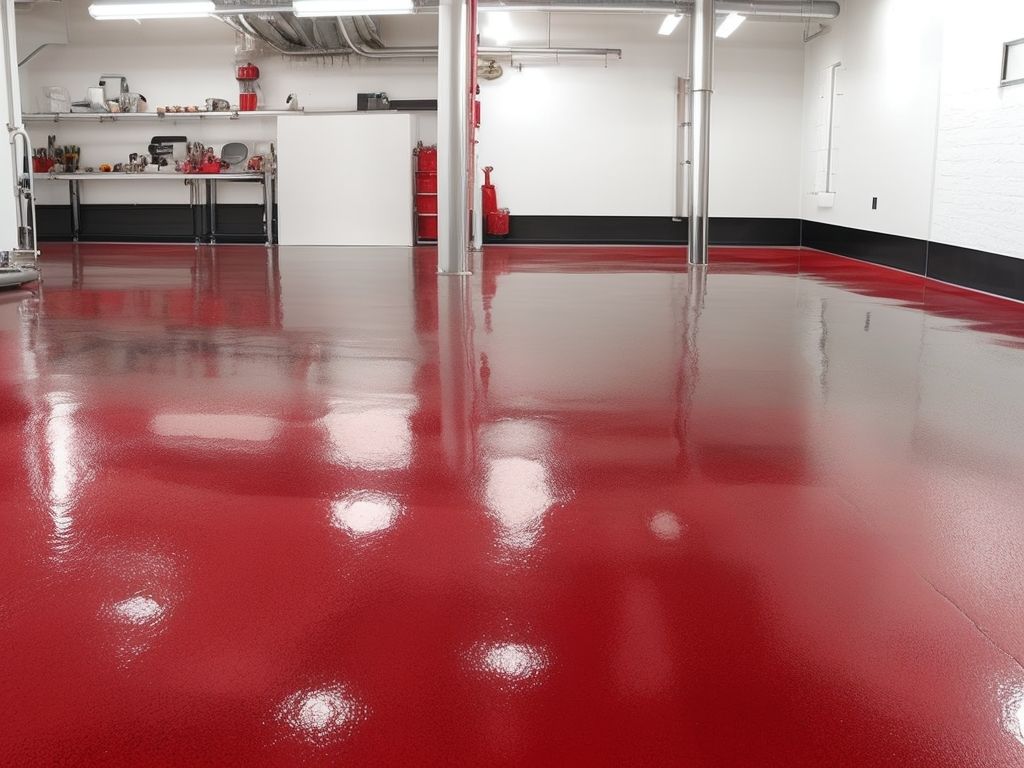
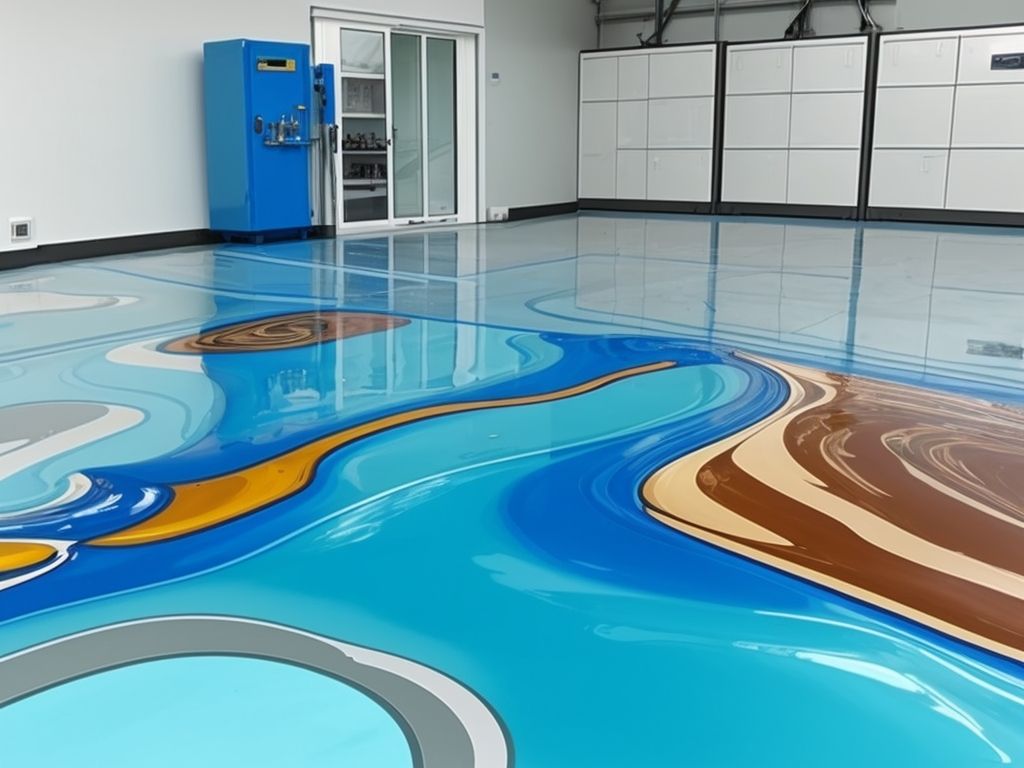
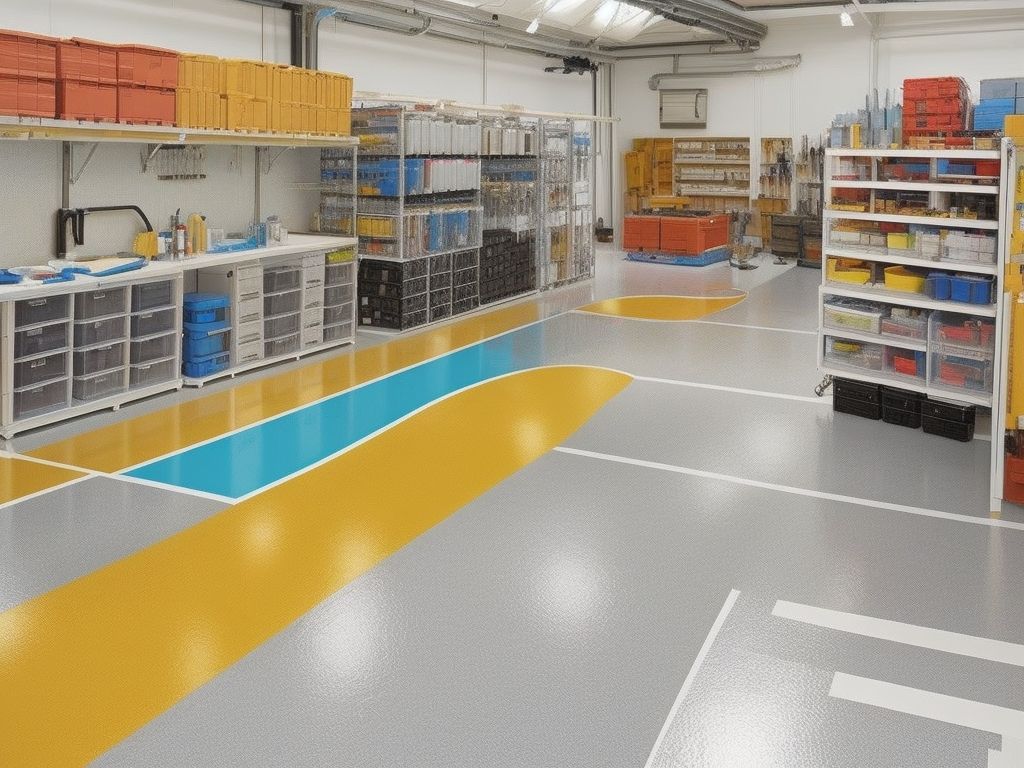
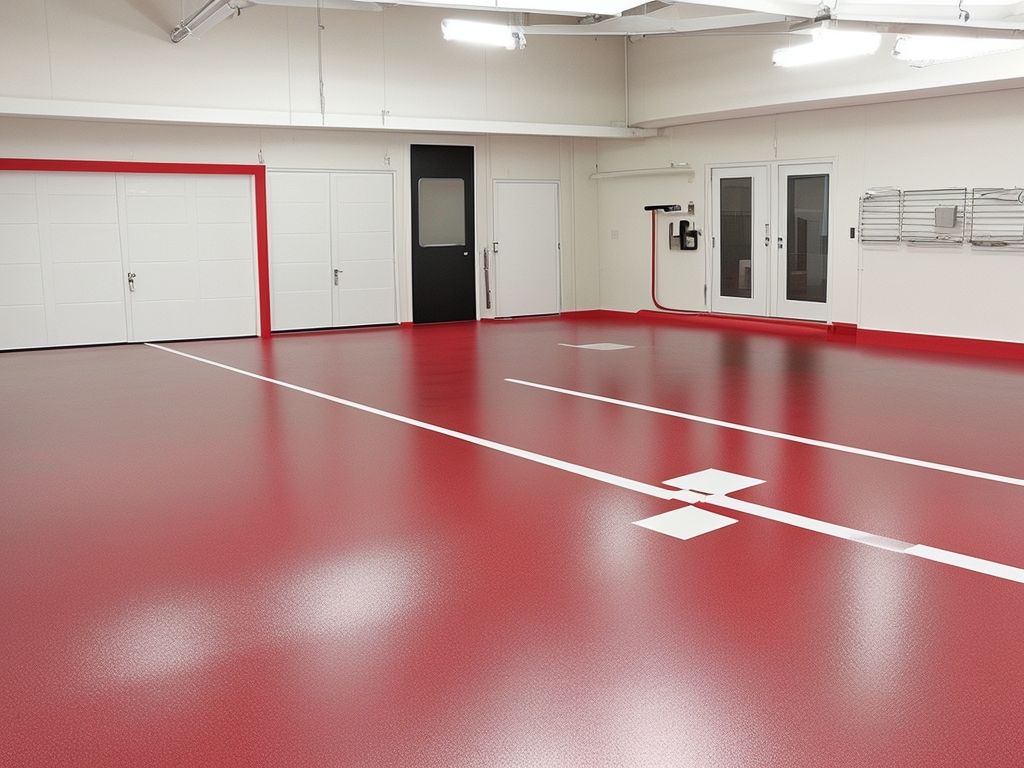
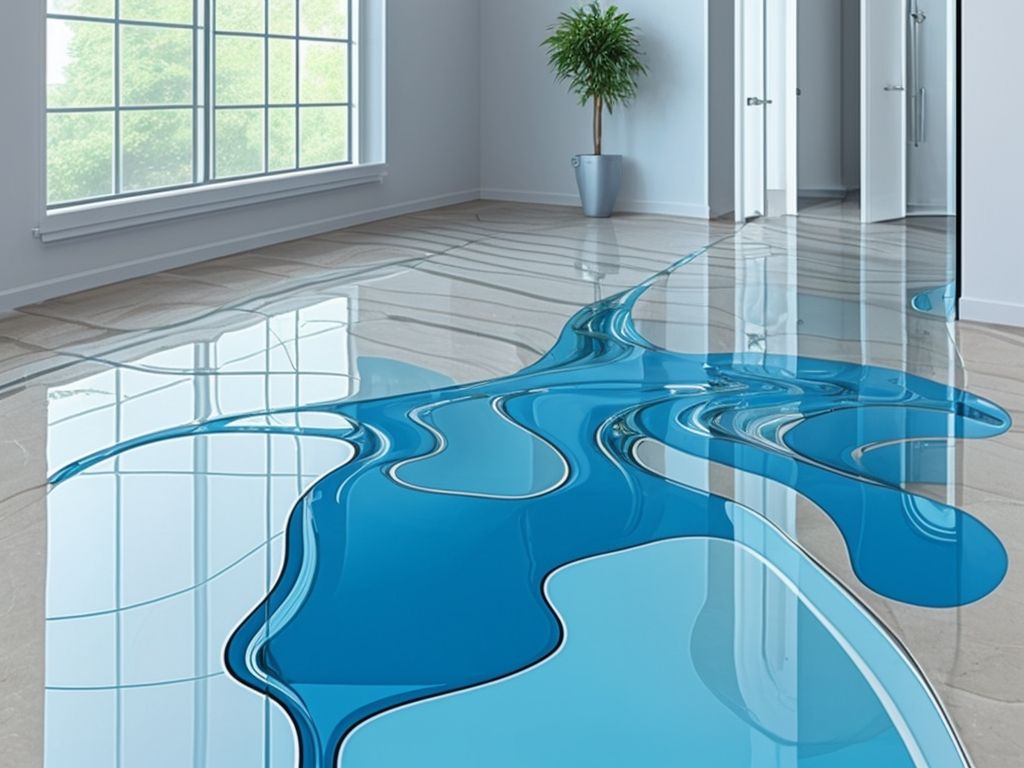
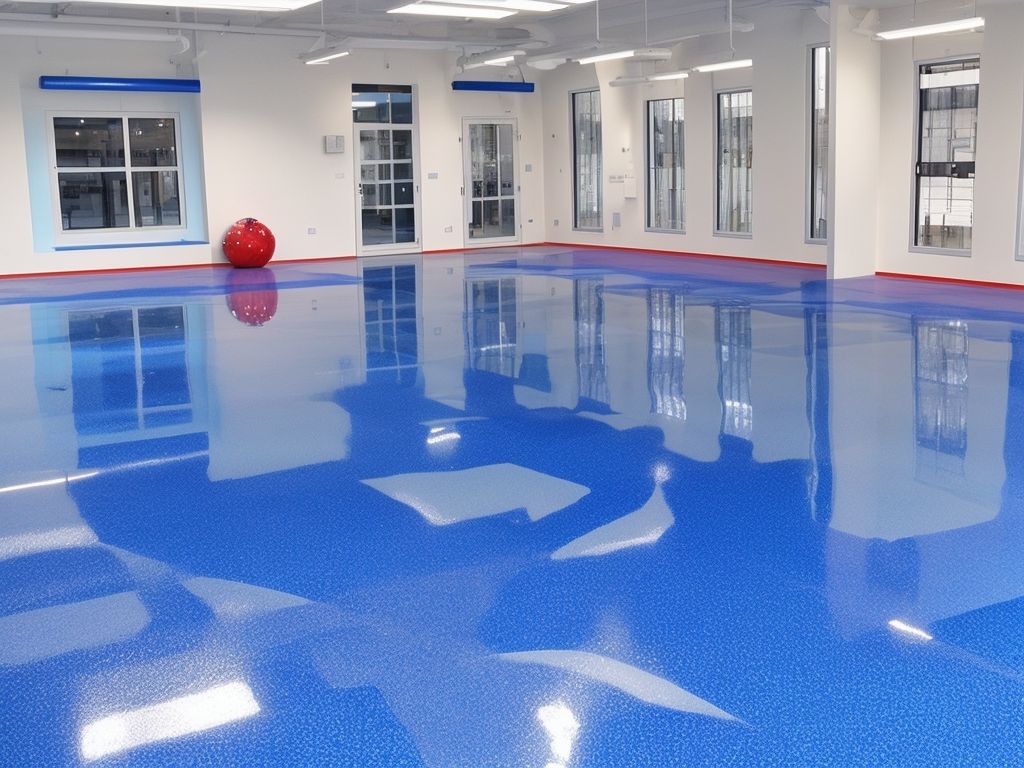
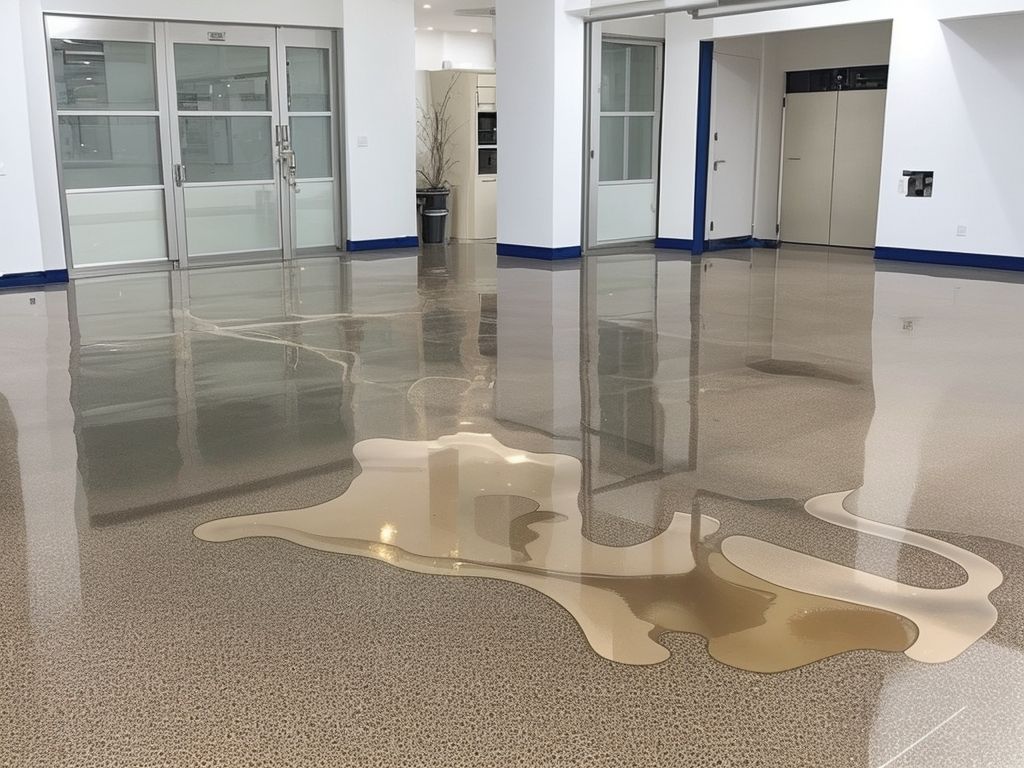
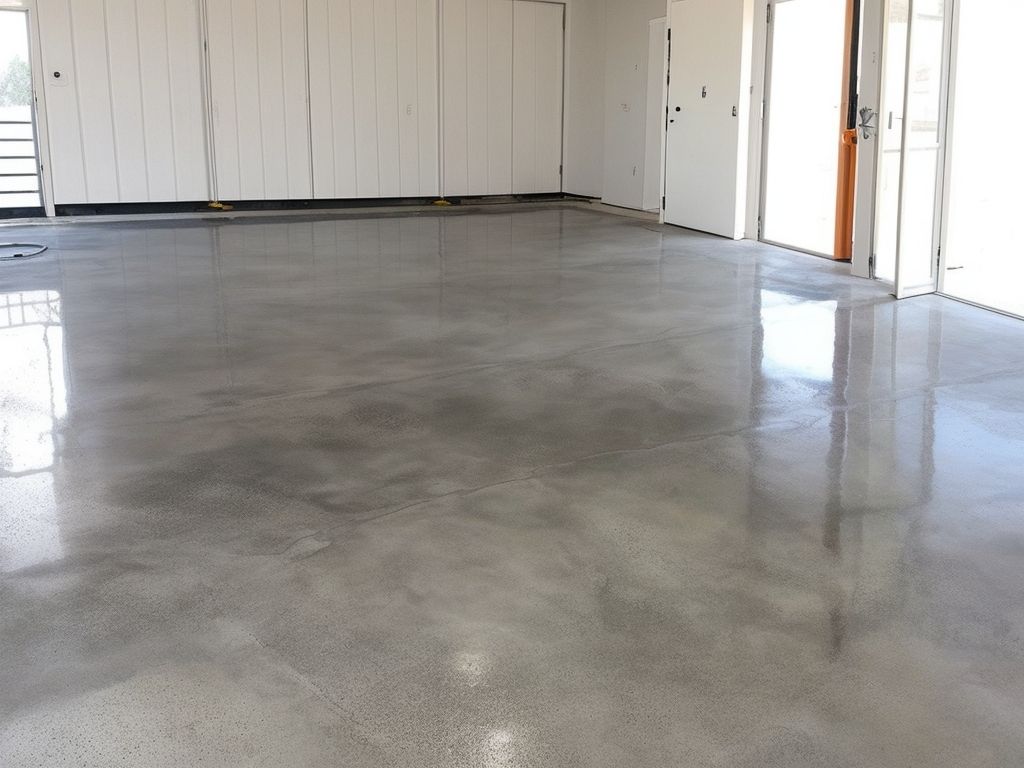
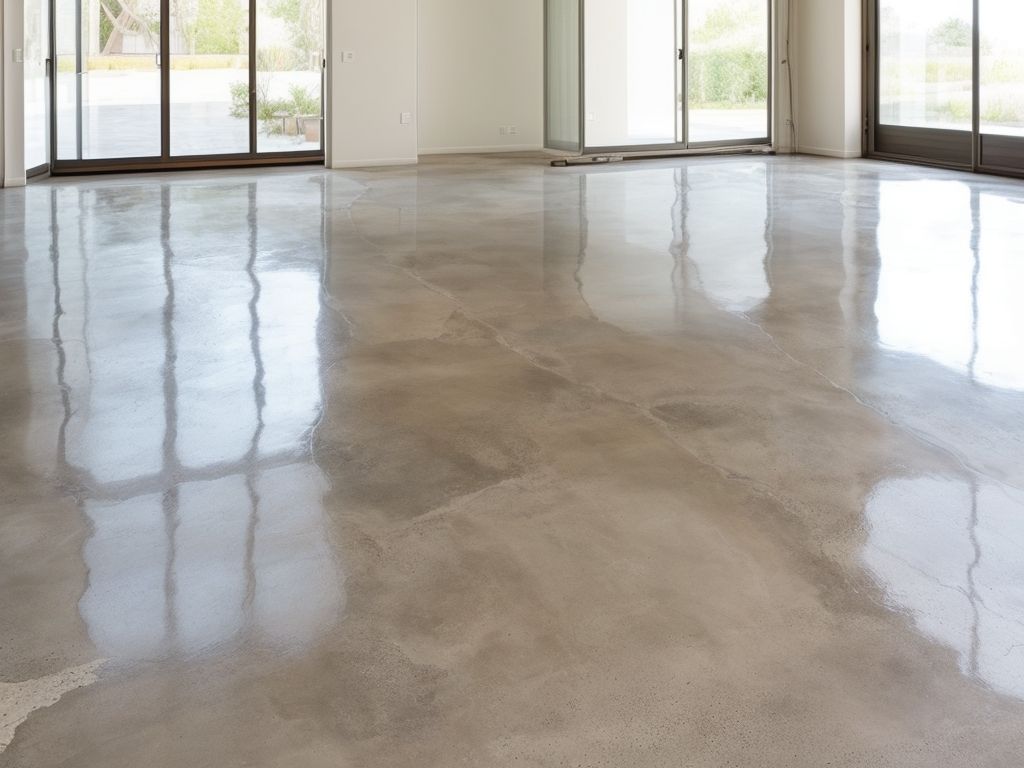
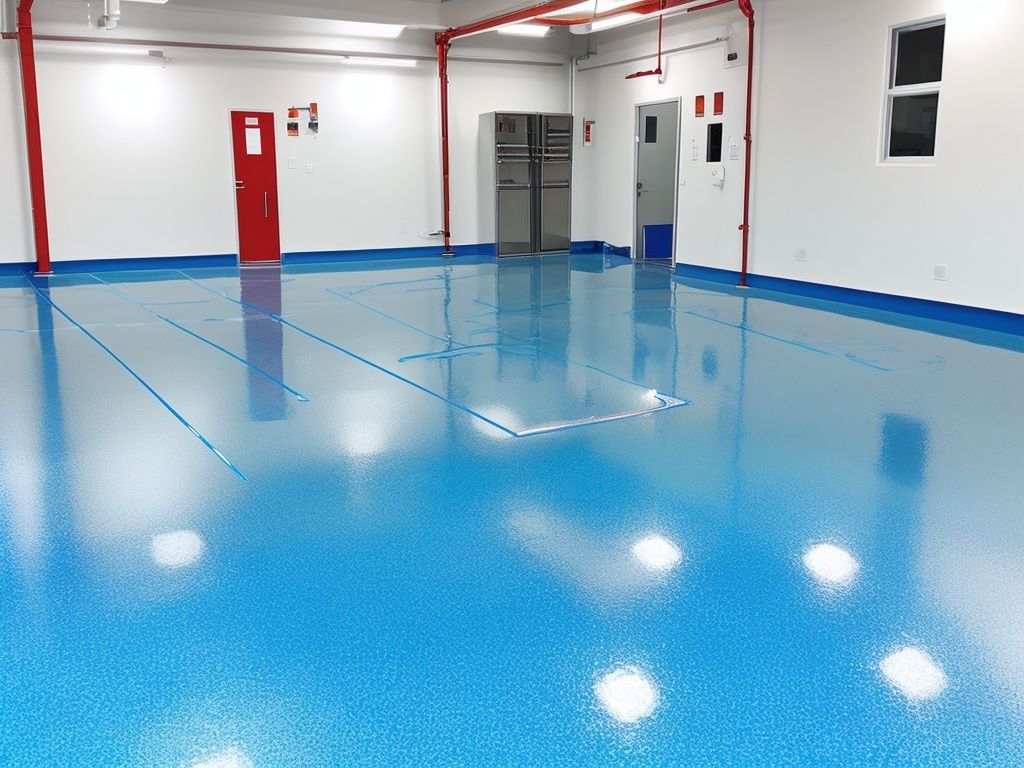
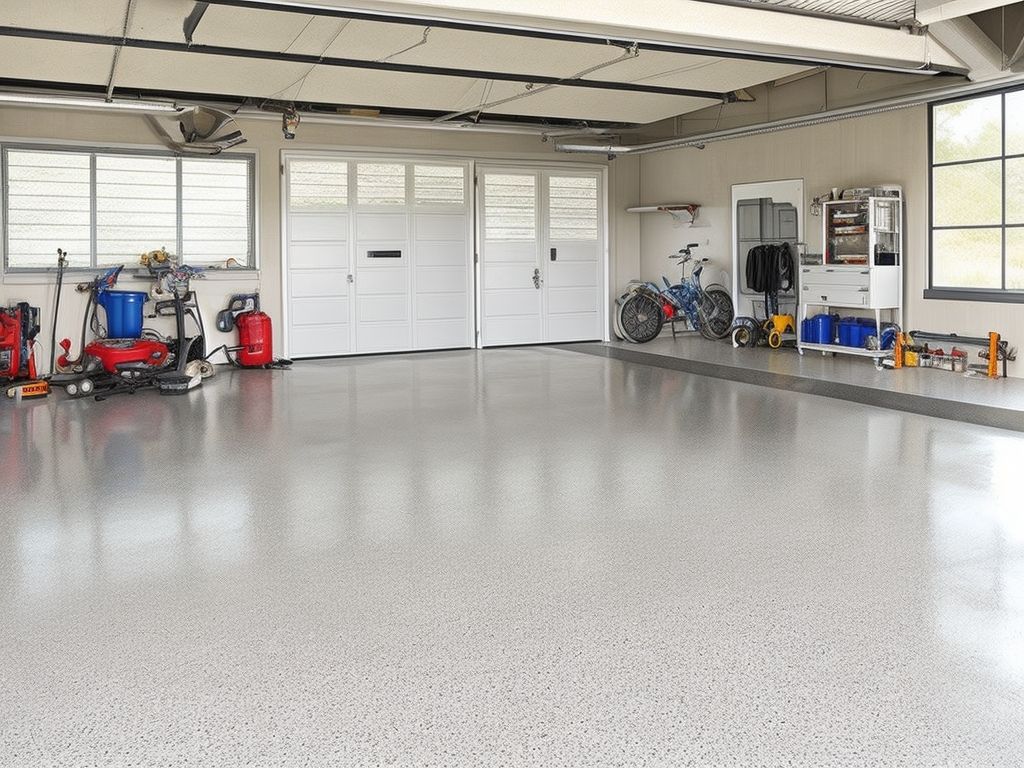
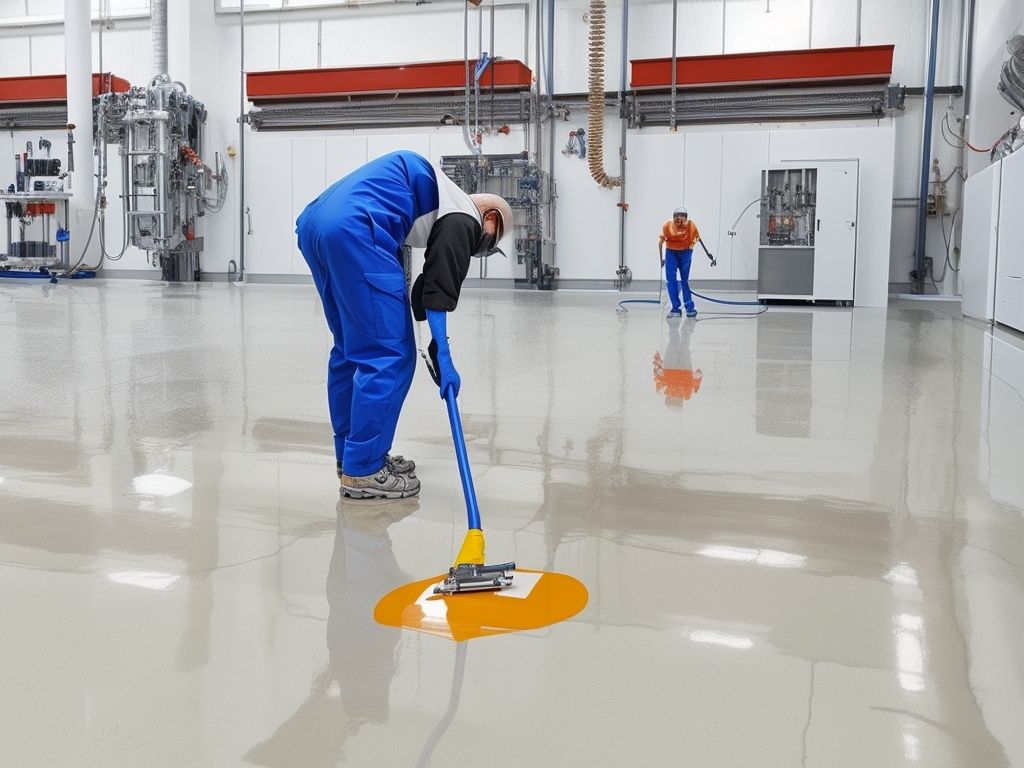
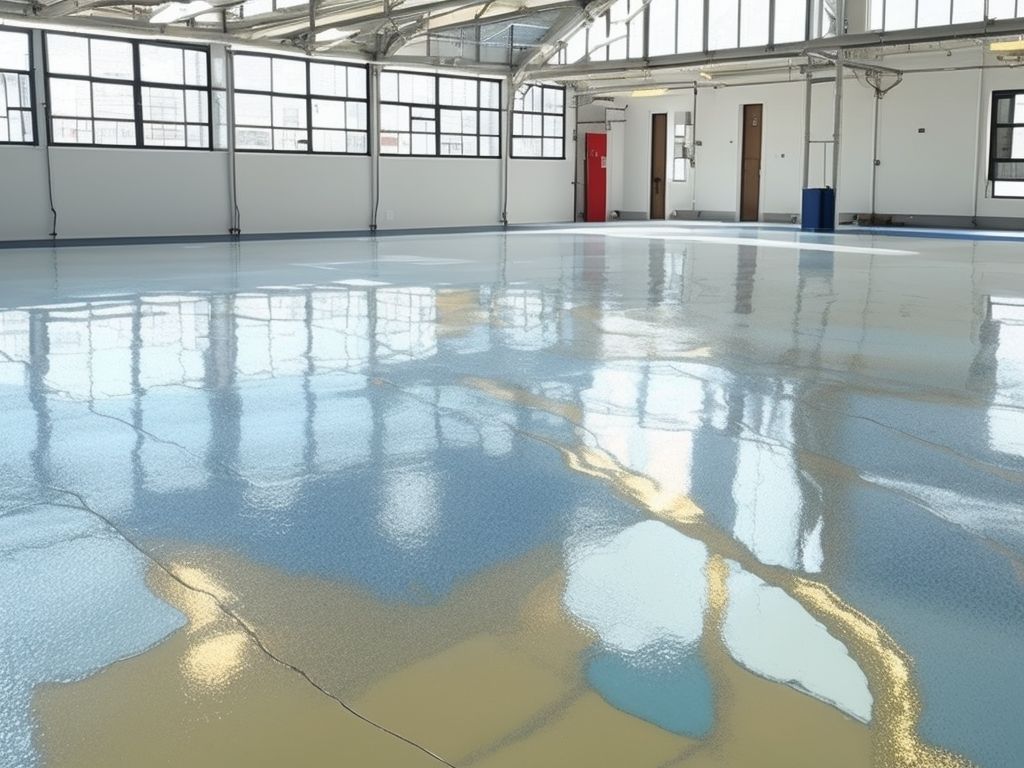
One type of flooring that has gained popularity in recent years is epoxy flooring. Epoxy flooring is a durable and versatile option that consists of multiple layers of epoxy resin applied to a concrete surface. It offers a smooth and seamless finish that is resistant to scratches, stains, and odors. Epoxy flooring is also known for its high gloss and attractive appearance.
Is Epoxy Flooring Suitable for Dogs?
When deciding whether epoxy flooring is a good choice for dogs, several factors should be taken into account. Here are some key considerations:
Factors to Consider Before Installing Epoxy Flooring
Before installing epoxy flooring in a dog-friendly space, there are a few factors to consider. These include:
Maintaining Epoxy Flooring in a Dog-Friendly Manner
To keep epoxy flooring in optimal condition in a dog-friendly environment, regular cleaning and maintenance are essential. Sweeping or vacuuming should be done regularly to remove any loose debris or pet hair. Spills or accidents should be cleaned promptly to prevent stains. Using protective measures such as rugs or mats in high-traffic areas or near food and water bowls can also help preserve the longevity of the flooring.
1. Epoxy flooring is a good choice for dogs because it is durable and scratch-resistant, ensuring that it can withstand the activities of energetic pets.
2. Epoxy flooring is easy to clean and maintain, making it a convenient option for pet owners.
3. Epoxy flooring is resistant to stains and odors, helping to keep your home clean and fresh even with pets around.
Considering these factors, it is recommended to choose flooring that provides comfort, safety, and durability for your pets. It is also important to keep their specific needs and preferences in mind. Consulting with a flooring professional can help you make the best choice for your furry friends.
Flooring has a significant impact on dogs’ health and well-being. The type of flooring can affect their comfort, safety, and overall quality of life. Here are some ways flooring can affect dogs:
1. Hard surfaces like tile or concrete can strain dogs’ joints and lead to discomfort or even injuries over time. Softer flooring options like rubber or carpet can provide better cushioning and support for their paws and joints.
2. Slippery floors can be hazardous for dogs, especially for older dogs or those with mobility issues. Non-slip flooring, such as textured tiles or non-slip mats, can enhance safety and prevent accidents or injuries.
3. Dogs are prone to allergies and respiratory issues, and certain flooring materials like carpets can harbour dust, dirt, and allergens. Choosing flooring options that are easy to clean, like hardwood or laminate, can reduce the risk of allergens and keep the indoor environment healthier for dogs.
4. Dogs may have accidents or spills, and flooring that absorbs and retains odours can create an unpleasant living environment. Opting for stain-resistant and odour-resistant flooring, such as vinyl or sealed concrete, can help maintain a clean and fresh-smelling space.
5. The temperature of the flooring can affect dogs’ comfort. In colder climates, choosing flooring options that retain warmth, such as carpet or heated floors, can provide dogs with a cosy and comfortable environment.
By considering these factors and choosing the right flooring, dog owners can ensure their dogs’ health and well-being are prioritised, leading to a happier and healthier life for their furry friends.
When choosing flooring for dogs, it is important to consider several factors to ensure the best choice for their well-being and safety.
1. Durability and Scratch Resistance: Dogs are active and may scratch or damage certain types of flooring. It is advisable to opt for durable and scratch-resistant flooring materials, such as laminate or vinyl.
2. Ease of Cleaning and Maintenance: Dogs can create messes, so it is crucial to choose flooring that is easy to clean and maintain. Carpets or rugs should be avoided as they can trap dirt and odors. Instead, consider tiles or hardwood floors that can be easily wiped or mopped.
3. Resistance to Stains and Odors: Accidents happen, and it is important to select flooring that is resistant to stains and odors. Look for materials that have protective coatings or sealants to prevent the absorption of liquids.
4. Paw and Joint Comfort: Dogs spend a significant amount of time on their feet, so it is essential to choose flooring that provides comfort and support for their paws and joints. Consider materials that offer good shock absorption, such as cork or rubber flooring.
5. Safety in Terms of Slip Resistance: Dogs can easily slip and injure themselves on slippery floors. Opt for flooring options that provide good traction and slip resistance to minimize the risk of accidents.
6. Chemical-Free and Non-Toxic: Dogs may come into contact with the flooring, so it is important to choose materials that are free from harmful chemicals or toxins. Look for flooring options that are labelled as non-toxic and eco-friendly.
By considering these factors, you can choose flooring that is not only aesthetically pleasing but also safe and comfortable for your furry friends.
Epoxy flooring is a type of flooring that has gained a lot of attention in recent years. It is known for its unique composition and characteristics. So, let’s dive into the world of epoxy flooring and explore what it has to offer.
To comprehend the composition and characteristics of epoxy flooring, let’s examine its key components and properties.
Composition:
– Epoxy flooring is a type of floor coating that comprises epoxy resin and a curing agent or hardener.
– The epoxy resin is derived from petroleum or eco-friendly sources and is mixed with the curing agent to create a strong, durable plastic material.
– Additional additives, such as pigments, fillers, and aggregates, can be added to the epoxy mixture to enhance specific properties.
Characteristics:
1. Strength and Durability:
– Epoxy flooring is renowned for its exceptional strength and durability, making it resistant to heavy foot traffic, impacts, and abrasions.
– It can withstand the weight of machinery and equipment without cracking or wearing down easily.
2. Chemical Resistance:
– Epoxy flooring exhibits excellent resistance to a wide range of chemicals, including oils, solvents, acids, and cleaners.
– This makes it suitable for use in industrial settings, garages, and laboratories where chemical spills are common.
3. Hygiene and Cleanliness:
– Epoxy flooring provides a seamless, non-porous surface that is easy to clean and maintain.
– It resists stains, dirt, and bacteria, contributing to a hygienic environment.
4. Slip Resistance:
– The addition of aggregates or anti-slip additives to the epoxy mixture can improve its slip resistance, ensuring safety, especially in areas prone to wet conditions.
5. Versatility and Aesthetic Appeal:
– Epoxy flooring comes in a variety of colours, finishes, and patterns, offering versatility in design options.
– It can be customised to create a visually appealing and professional-looking floor.
When considering epoxy flooring, it is essential to evaluate factors such as the specific usage requirements, desired aesthetic, and budget. Consulting with a professional installer and understanding the unique needs of your space will help determine if epoxy flooring is the right choice for you.
Remember to consider the composition and characteristics of epoxy flooring to make an informed decision that meets your requirements for durability, hygiene, chemical resistance, and aesthetics.
Epoxy flooring is a popular choice for many homeowners, but is it also suitable for dogs? Let’s explore the key factors that determine whether epoxy flooring is a good option for our furry friends. We’ll discuss its durability and scratch resistance, ease of cleaning and maintenance, resistance to stains and odors, paw and joint comfort, slip resistance for safety, and its chemical-free and non-toxic properties. Let’s find out if epoxy flooring is the ideal match for your four-legged companions.
Durability and scratch resistance are important factors to consider when choosing epoxy flooring for dogs. Epoxy flooring is known for its exceptional durability, making it an ideal choice for areas where dogs frequently walk or play.
When comparing the durability of different flooring options, it is important to consider the hardness of the material. Epoxy flooring has a high hardness rating, which means it is less prone to scratches or damages caused by dog nails or heavy foot traffic.
In terms of scratch resistance, epoxy flooring performs exceptionally well. It can withstand the daily wear and tear from dogs’ claws, reducing the risk of unsightly scratches or gouges.
To further enhance the scratch resistance of epoxy flooring, it is recommended to apply a topcoat or sealer. This additional layer provides an extra level of protection against scratches and ensures the longevity of the flooring.
Epoxy flooring offers excellent durability and scratch resistance, making it a suitable choice for dog owners. Its hard surface and resistance to scratches make it a durable and long-lasting option for areas where pets roam freely.
The ease of cleaning and maintenance for epoxy flooring is an important factor to consider when choosing flooring for dogs. Here are some key points to keep in mind:
Epoxy flooring offers ease of cleaning and maintenance, making it a practical and convenient choice for dog owners.
| Epoxy Flooring Characteristics | Stains and Odors Resistance |
| 1. Durability and Scratch Resistance | Epoxy flooring provides excellent resistance to stains and odours due to its non-porous nature. Spills and accidents can be easily wiped away without leaving behind any lingering stains or odours. |
| 2. Ease of Cleaning and Maintenance | The smooth and seamless surface of epoxy flooring makes it easy to clean. Stains and odours can be removed with regular cleaning solutions, and there is no need for specialised cleaners. |
| 3. Resistance to Stains and Odours | Epoxy flooring is highly resistant to stains and odours as it forms a strong barrier against spills and accidents. It prevents liquids and odours from seeping into the flooring material. |
| 4. Paw and Joint Comfort | Epoxy flooring provides a smooth and comfortable surface for dogs to walk and play on. It offers cushioning and reduces the stress on their paws and joints, enhancing their overall comfort. |
| 5. Safety in Terms of Slip Resistance | Epoxy flooring can be customised with added slip-resistant properties, ensuring the safety of both pets and humans. It reduces the risk of slips and falls, even when the floor is wet or soiled. |
| 6. Chemical-Free and Non-Toxic | Epoxy flooring is free from harmful chemicals and toxins, making it a safe option for pets. It does not release any fumes or emit odours that could be harmful to their health. |
The resistance to stains and odours is one of the notable characteristics of epoxy flooring. Its non-porous nature creates a strong barrier, preventing liquids and odours from penetrating the surface. This means that spills and accidents can be easily wiped away without leaving behind any lingering stains or odours. Regular cleaning solutions can be used to maintain the cleanliness of epoxy flooring, without the need for specialised cleaners. Epoxy flooring forms a smooth and seamless surface, making it easy to clean and eliminate any potential odours. This feature is especially beneficial for dog owners, as accidents and spills are common occurrences with pets. With epoxy flooring, pet owners can have peace of mind knowing that any stains or odours can be quickly and effectively dealt with. The resistance to stains and odours enhances the durability and cleanliness of epoxy flooring, making it a practical choice for dog-friendly environments.
Ensuring paw and joint comfort is essential for the well-being of dogs when it comes to epoxy flooring. Here are some factors to consider:
Pro-tip: To enhance paw and joint comfort further, consider providing additional cushioning with pet-friendly mats or rugs in areas where dogs spend more time.
When considering the safety of epoxy flooring for dogs, it is important to assess its slip resistance. Here are some key factors to consider:
When it comes to slip resistance, epoxy flooring is an excellent choice for dog owners. Its high traction, customisable textures, durability, moisture resistance, and easy cleanliness make it a safe and practical flooring option for both dogs and their owners.
When it comes to epoxy flooring, one important aspect to consider is its chemical-free and non-toxic nature. This makes it a safe and healthy option, especially for dog owners. Here are some key points to understand:
Epoxy flooring provides a chemical-free and non-toxic solution that promotes a safe and pet-friendly environment for dogs.
Factors to Consider Before Installing Epoxy Flooring
Before deciding to install epoxy flooring for your dog, it is important to consider a few factors. These factors include the size and activity level of your canine companion, the preparation of the subfloor, hiring a professional installer, and taking into account the location and climate. Each of these aspects plays a crucial role in ensuring the suitability and longevity of epoxy flooring for your dog. Let’s explore these considerations to make an informed choice that keeps both your pup’s paws and your floors happy.
When considering the suitability of epoxy flooring for dogs, it is important to take into account the size and activity level of the dogs.
By considering the size and activity level of your dogs when choosing epoxy flooring, you can ensure that the flooring can withstand their weight and activities, minimizing the risk of damage and maintaining a long-lasting and functional flooring option for your furry friends.
When preparing the subfloor for epoxy flooring, it is important to follow several steps:
Following these steps will ensure that the subfloor is properly prepared for the application of epoxy flooring. It is important to carefully follow the manufacturer’s instructions for both the subfloor preparation and the epoxy installation process to achieve the best results.
When it comes to installing epoxy flooring for your dogs, it is important to hire a professional installation service to ensure a proper and high-quality outcome.
4. Location and Climate Considerations
Fact: Epoxy flooring is not only suitable for homes but is also commonly used in commercial and industrial settings due to its durability and resistance to various environmental factors.
Maintaining epoxy flooring in a dog-friendly manner is important to ensure the longevity and cleanliness of your floors. This section provides expert tips and tricks to keep your epoxy floors in top shape while accommodating your canine companions. You don’t need to worry about scratches or stains anymore – we’ve got you covered with practical advice and innovative approaches to maintain a paw-friendly environment.
To maintain your epoxy flooring in a dog-friendly manner, it is important to regularly clean and maintain it. Here are the steps you should follow to ensure the longevity and cleanliness of your epoxy flooring:
By following these regular cleaning and maintenance steps, you can keep your epoxy flooring in excellent condition, free from dirt, stains, and odors. This will provide a clean and safe environment for both you and your dogs.
When it comes to protecting your epoxy flooring from damage caused by dogs, there are several steps you can take to ensure its longevity and appearance:
By following these protective measures, you can ensure that your epoxy flooring remains in excellent condition and continues to provide a beautiful and durable surface for both you and your furry friend.
Exploring Common Concerns and Questions about Epoxy Flooring
When considering epoxy flooring for your dogs, it is important to explore common concerns and questions to make an informed decision. Here is a list of key considerations:
When exploring these concerns, it is essential to assess your specific needs and consult with professionals who specialize in epoxy flooring for pets. A pro-tip: Consider adding rubber mats or rugs in high-traffic areas to provide additional comfort and traction for your furry friends.
Yes, epoxy flooring is a great choice for dogs due to its key benefits. It is resistant to scratches from pet claws, making it suitable for active ones. Additionally, it has a non-slip surface, making it safe for pets to run and play on.
Epoxy flooring offers several advantages for pet owners. It is easy to clean, especially compared to wooden floors or ceramics, and it is also waterproof. The smooth and even surface of epoxy flooring makes it ideal for dealing with accidents, spills, and fur accumulation.
Yes, epoxy flooring, such as Everlast® Epoxy flooring, is durable and can withstand the foot traffic of dogs and cats. It is a hard-wearing flooring solution that is suitable for both residential premises and commercial pet grooming salons.
Yes, many epoxy floor coatings, including Everlast® Epoxy flooring, have an EPA-registered antimicrobial additive. This helps impede the spread of microorganisms, ensuring a sanitary environment for pets.
Yes, epoxy flooring is easy to clean with minimal effort. Its nonporous surface prevents liquids from seeping into the substrate and causing damage. Additionally, it can withstand deep cleaning and sanitizers without any issues.
Yes, epoxy flooring is available in a range of colors and designs, allowing pet owners to create a welcoming environment for their four-pawed friends. There are even options like B-Protek’s epoxy floor coating that not only serve functional purposes but are also aesthetically pleasing.
































































Concrete for Basement Floor Repair: How to Fix Cracks and Damage
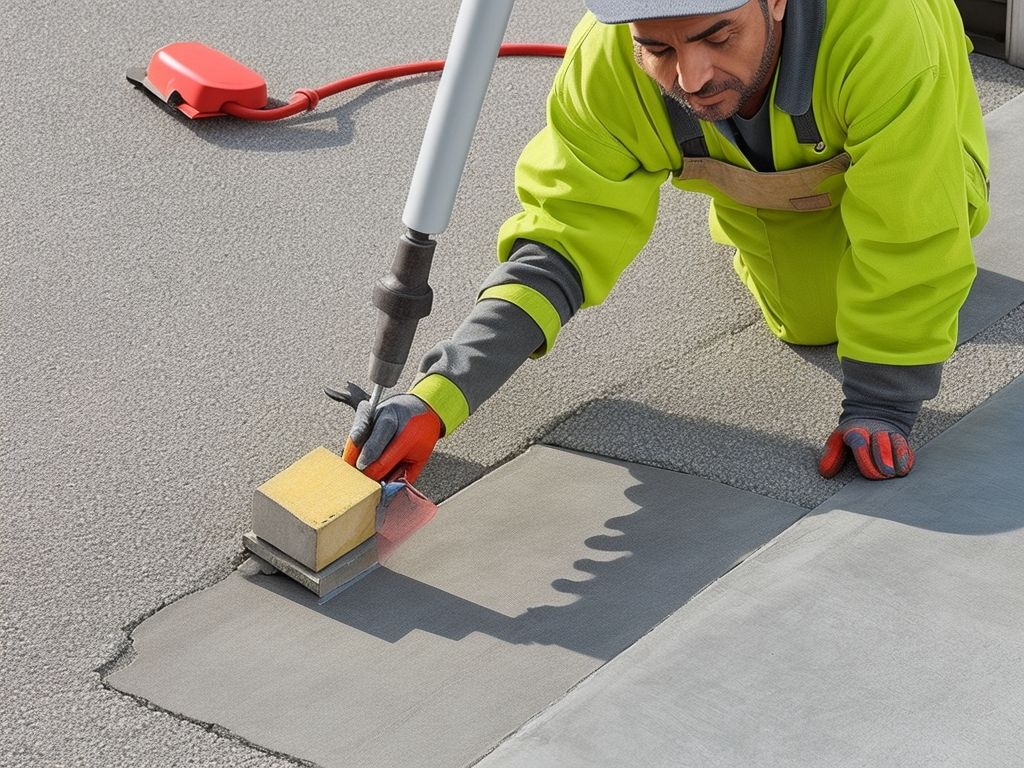
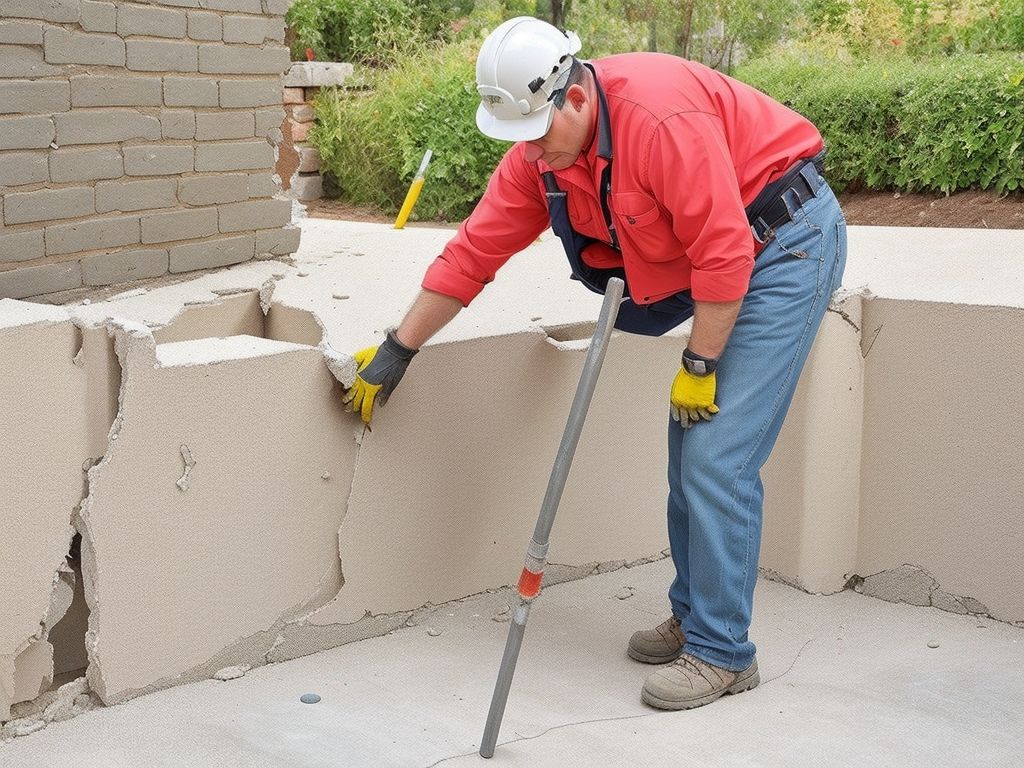
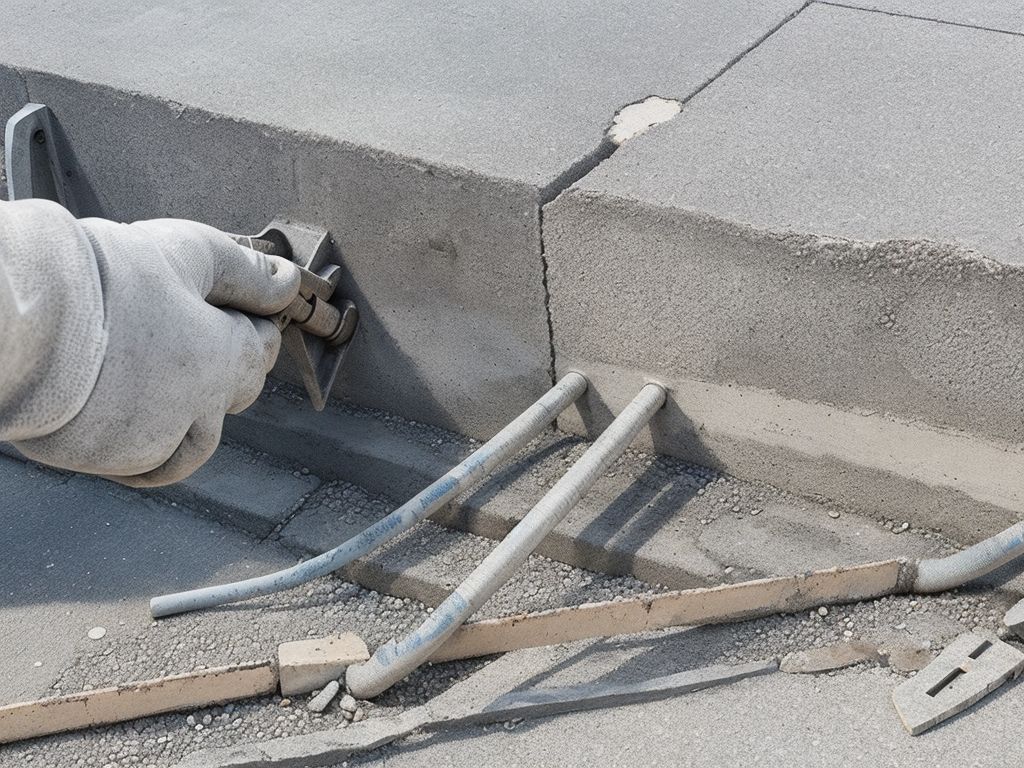
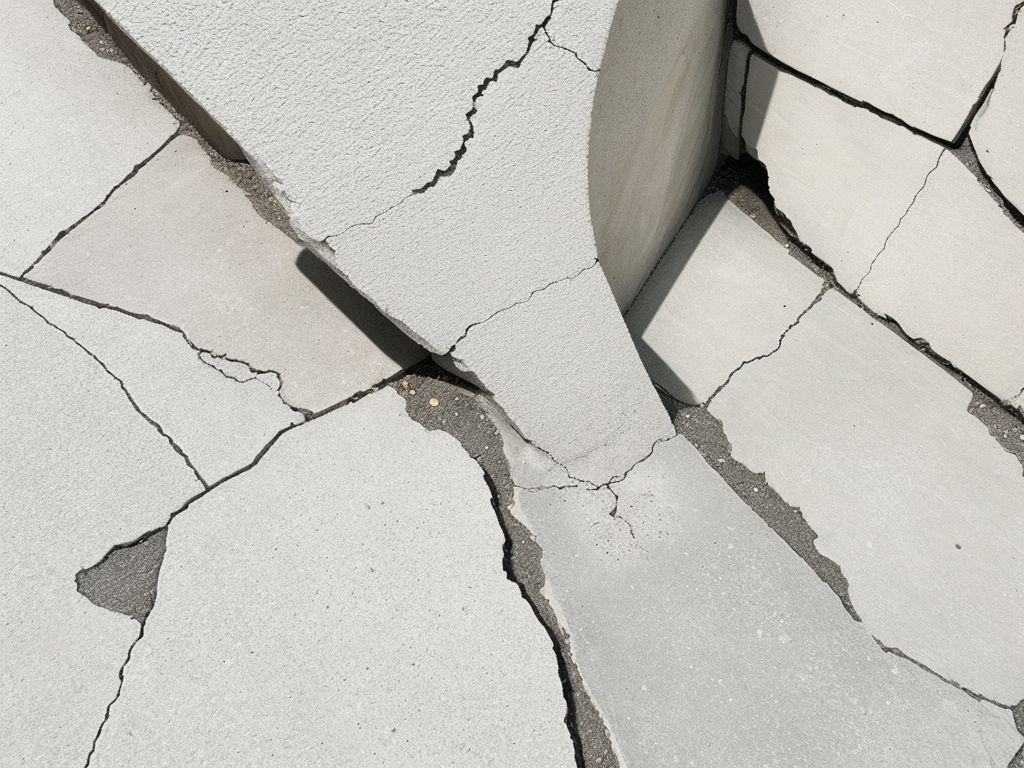
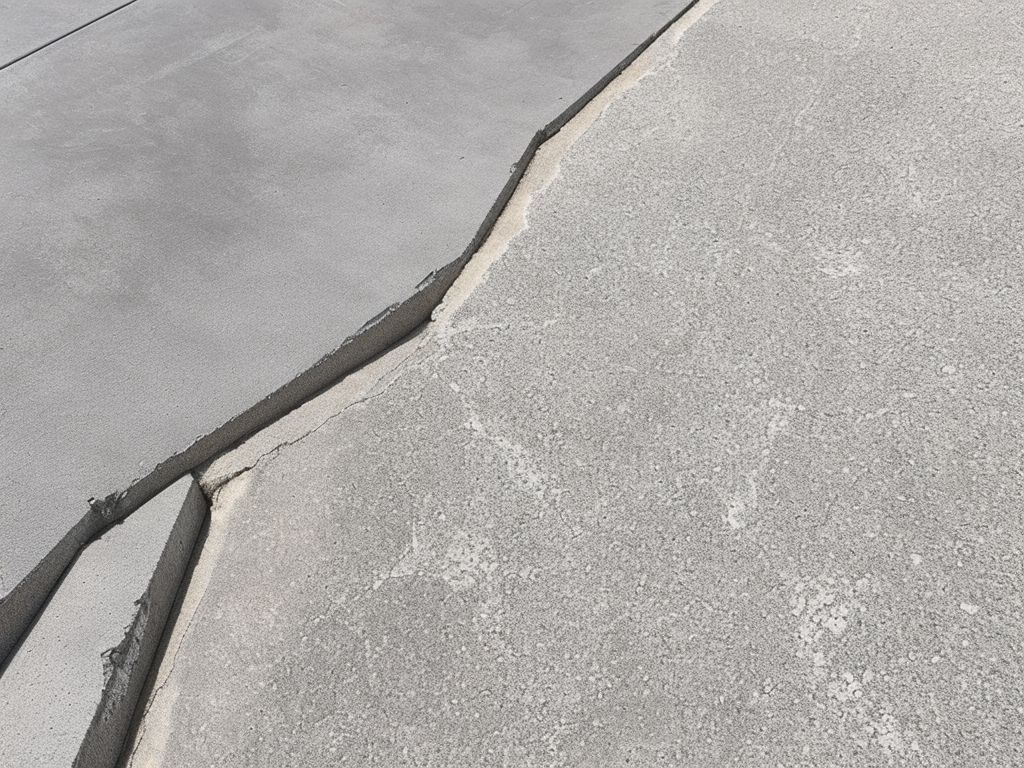
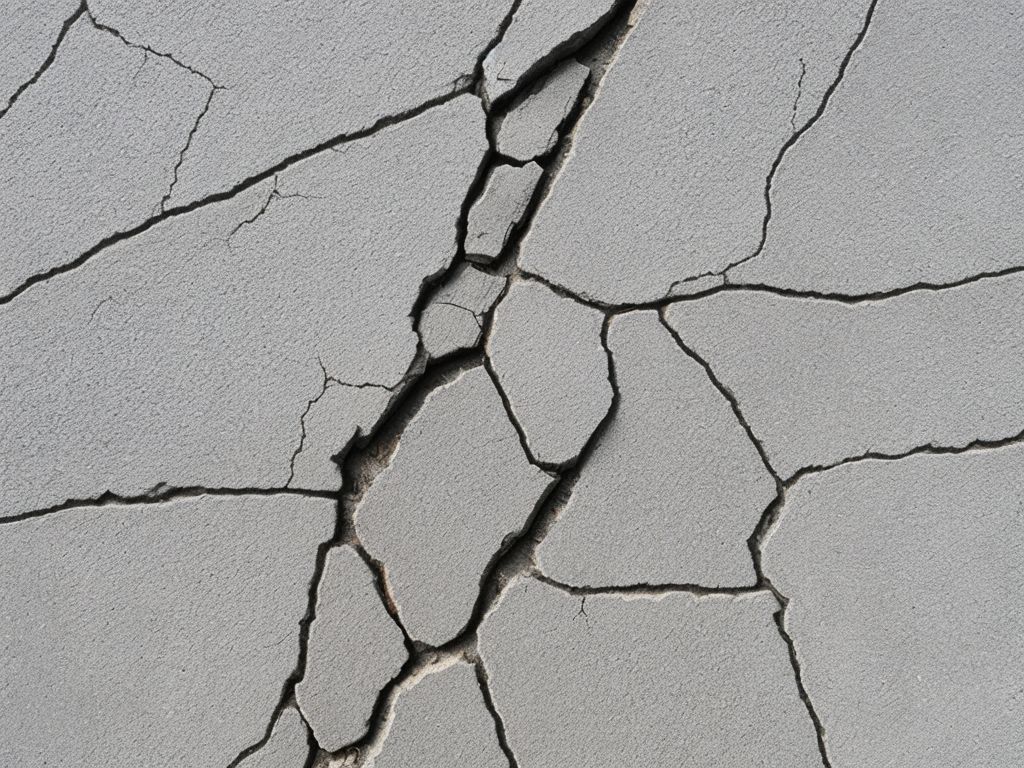
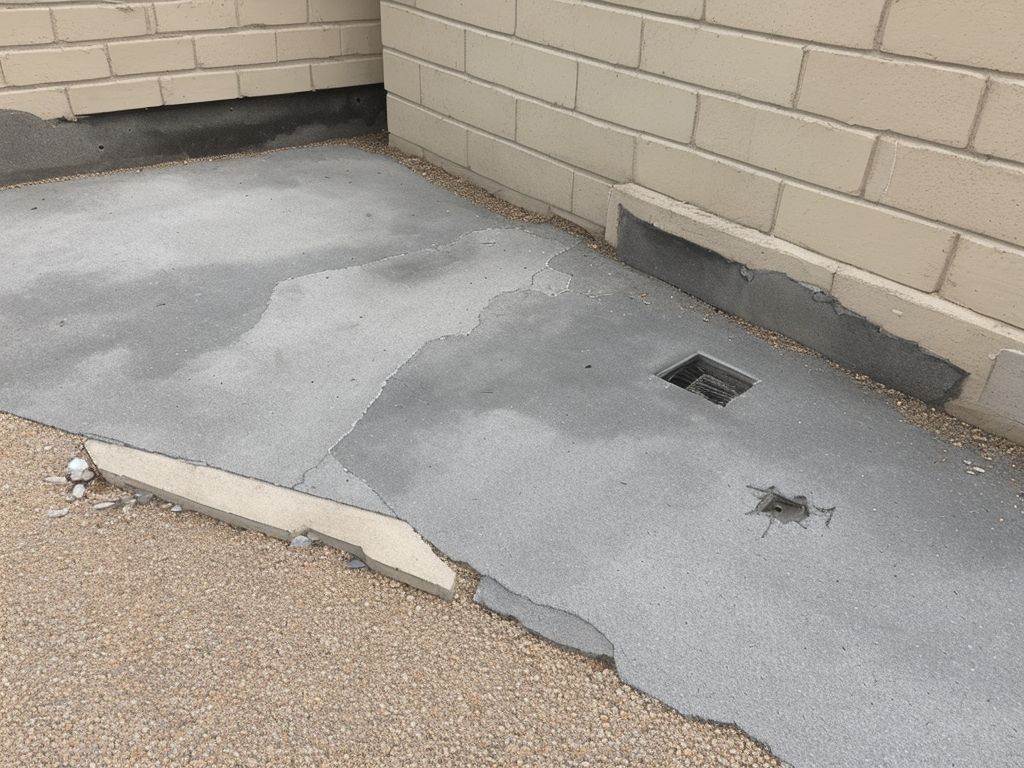
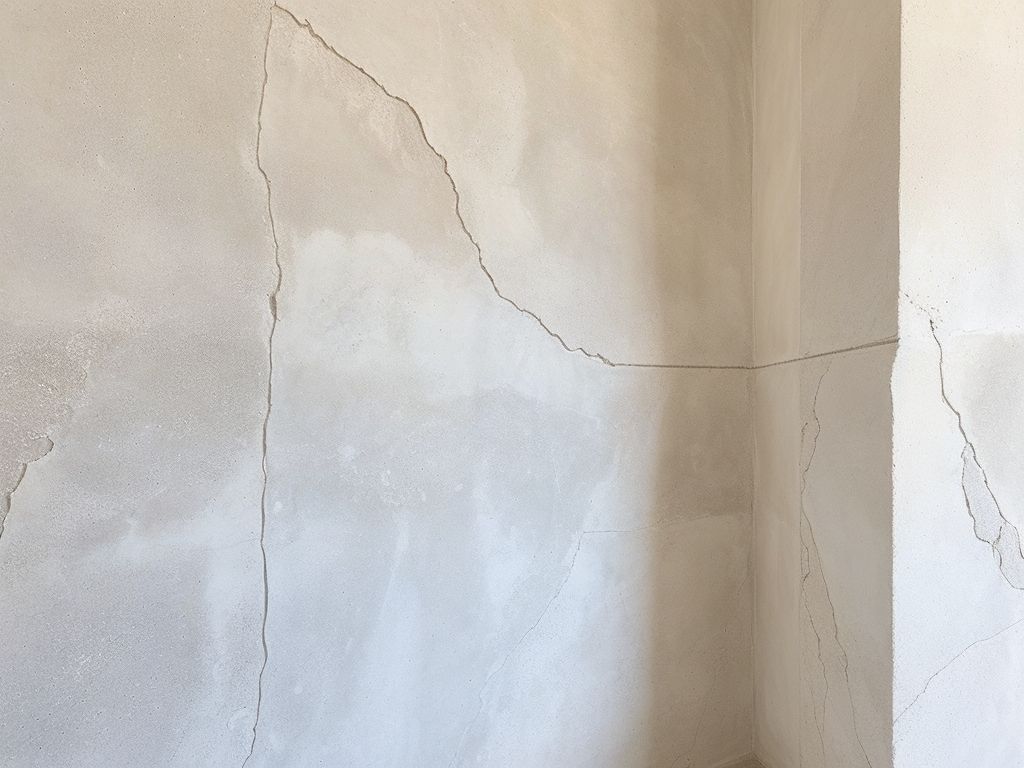
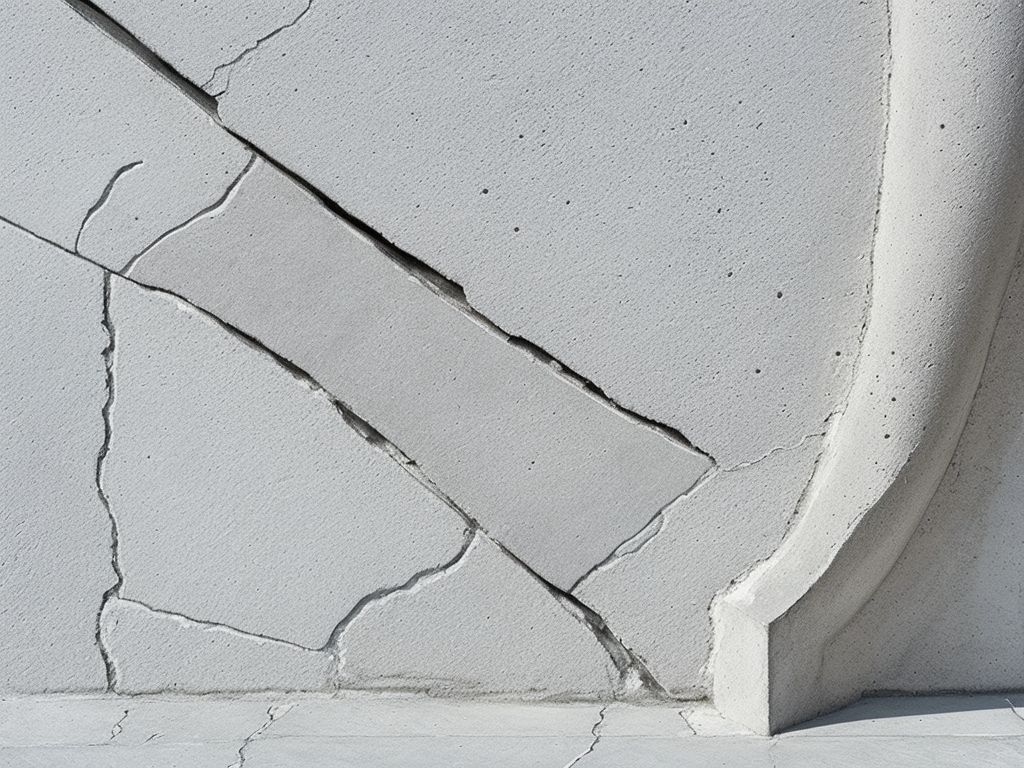
The basement floor is susceptible to cracks and damage due to various factors such as foundation settlement, shrinkage, or spalling. Recognizing the common types of cracks and damage is the first step in effective repair. In this article, we will discuss different types of cracks and damage, the necessary preparation for repair, and step-by-step instructions on how to fix hairline cracks, shrinkage and settlement cracks, and address spalling damage. we will provide valuable tips for preventing future damage. Whether you are a DIY enthusiast or seeking professional assistance, this guide will help you restore your basement floor to its original condition. Let’s dive into the details and learn how to properly repair cracks and damage in your basement floor using concrete.
This section explores the most common types of cracks and damage that can affect your basement floor. It provides valuable insights into these issues, enabling you to identify and address them effectively. Say goodbye to guesswork and unsightly floor problems as we delve into the remedies for achieving a seamless and sturdy basement floor.
Shrinkage Cracks
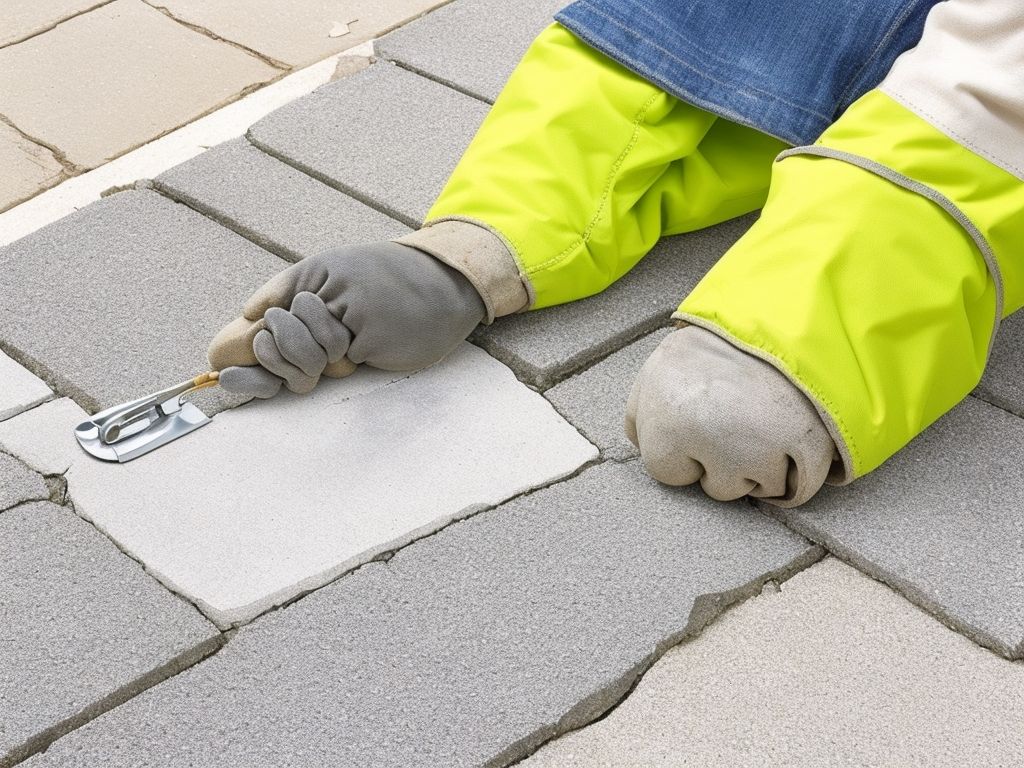
When dealing with larger or more severe shrinkage cracks, it may be necessary to use epoxy or polyurethane injection to fill the crack. This method provides a stronger and more durable repair. After filling the crack, apply a concrete patching compound to further enhance the repair.
Preventing future shrinkage cracks can be achieved by ensuring proper curing techniques during the initial concrete installation, such as using curing compounds or covering the concrete with plastic. Maintaining a consistent moisture level in the basement can help minimize the occurrence of shrinkage cracks. Regular inspections and prompt repairs of any cracks that do develop can also help prevent further damage and deterioration.
Did you know that settlement cracks are common in older buildings, but they can also occur in newer constructions? Proper and timely repair of settlement cracks is essential to maintain the structural integrity of the building.
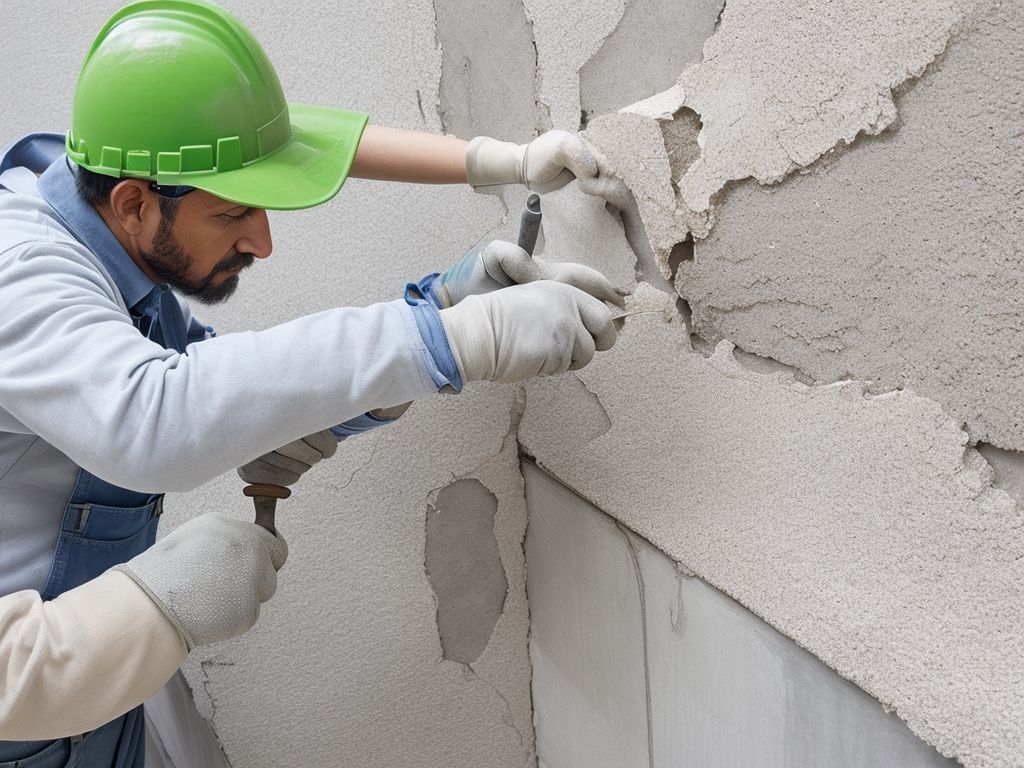
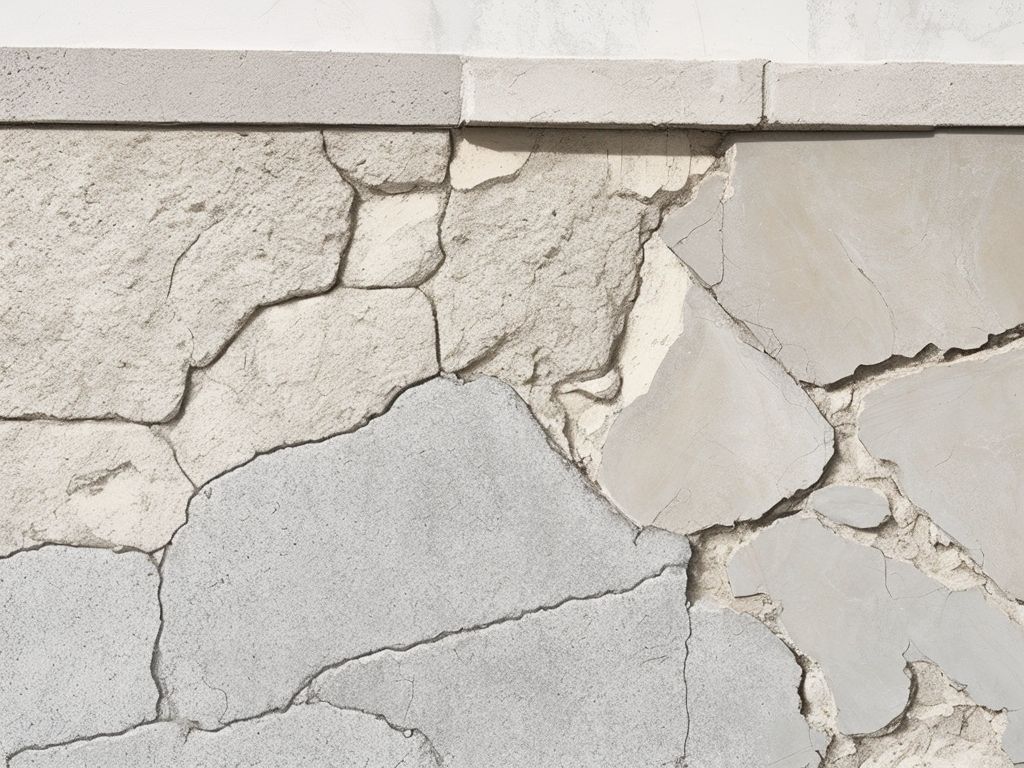
Spalling damage is a common issue that affects concrete basement floors. It occurs when the surface of the concrete starts to flake or chip away. This can be caused by various factors such as freeze-thaw cycles, improper curing techniques, or excess moisture. It is important to address spalling damage promptly to prevent further deterioration and maintain the integrity of your basement floor.
Before you start fixing cracks and damage in your basement floor, it’s important to prepare properly. This section will discuss the necessary steps to take before beginning any repair work. These steps include clearing the area, assessing the severity of the damage, and gathering all the necessary tools and materials. By following these steps, you will be fully prepared to tackle the task at hand and ensure a successful basement floor repair project. Let’s get started!
To prepare for concrete basement floor repair, start by clearing the area. Follow these steps:
By clearing the area properly, you ensure that there are no obstacles or debris that could interfere with the repair process. It also helps create a clean and safe workspace for the repair work to be done efficiently and effectively.
Remember to wear appropriate safety gear, such as gloves and goggles, during the clearing process to protect yourself from potential injuries.
To assess the severity of the damage to your concrete basement floor, you can follow these steps:
Assessing the severity of the damage to your concrete basement floor is crucial in determining the appropriate repair approach. Remember to address any structural issues promptly to prevent further damage and ensure the safety of your basement.
When preparing for a concrete basement floor repair, it is crucial to gather the necessary tools and materials. Here are the steps to follow:
1. Create a list: Before starting the repair, make a list of the tools and materials you will need. This will ensure that you have everything on hand before you begin.
2. Safety equipment: Wear safety goggles, gloves, and a face mask to protect yourself from dust and debris.
3. Cleaning tools: Gather a broom, dustpan, and a vacuum cleaner to remove any dirt and debris from the area.
4. Concrete crack filler: Depending on the size and depth of the cracks, you will need a suitable concrete crack filler. Choose a product that is compatible with your specific repair needs.
5. Trowel: A trowel is necessary for smoothing and applying the concrete crack filler into the cracks.
6. Wire brush: Use a wire brush to clean the cracks and remove any loose materials before applying the filler.
7. Putty knife: A putty knife will help you apply the filler evenly and smooth out the surface.
Story: One homeowner, John, discovered multiple cracks in his basement floor after heavy rainfall caused water damage. Determined to fix the issue, John gathered all the necessary tools and materials, including the concrete crack filler, trowel, wire brush, and putty knife. With his safety goggles and gloves on, he diligently cleaned the cracks and applied the filler, taking care to ensure a smooth finish. Thanks to his thorough research and proper preparation, John successfully repaired the cracks in his basement floor, preventing any future water damage.
Want to fix those annoying hairline cracks in your basement floor? Look no further! This section will guide you through the step-by-step process of fixing hairline cracks using concrete. From preparing the crack to applying the concrete crack filler and giving your surface a smooth finish, we have you covered. Bid farewell to those unsightly cracks and welcome a seamless basement floor!
When it comes to cleaning and preparing the crack in your concrete basement floor, there are a few important steps to follow:
To prevent future damage to your concrete basement floor, consider the following suggestions:
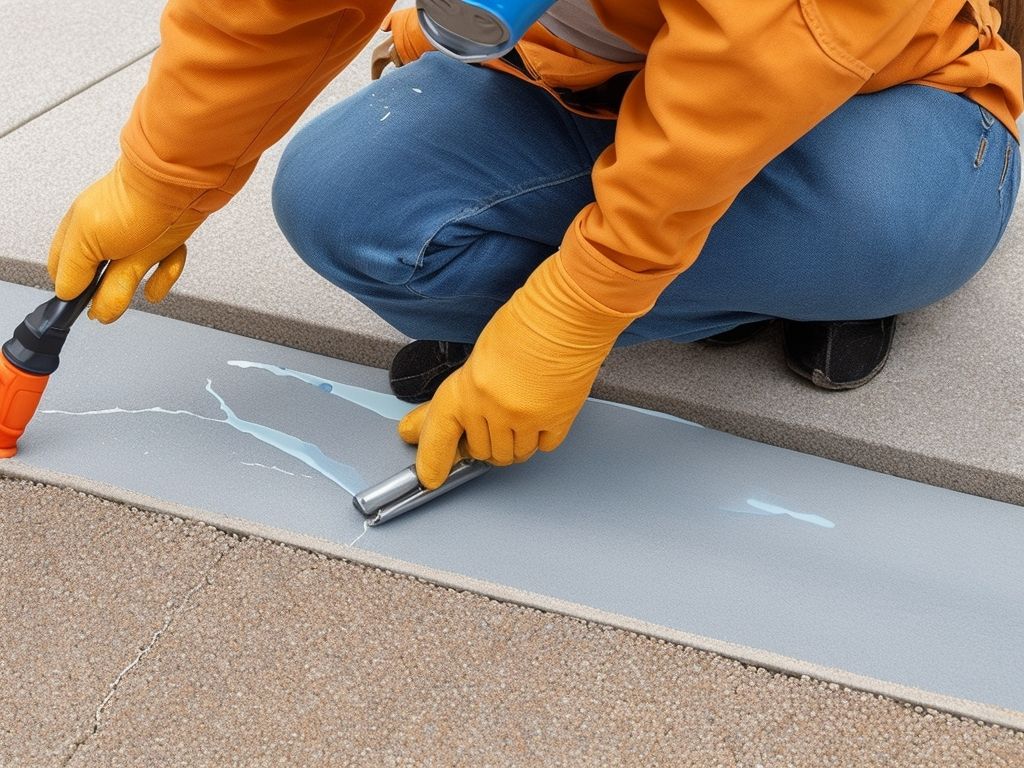
To apply concrete crack filler, follow these steps:
I had a crack in my basement floor that caused water leakage during heavy rain. I decided to apply concrete crack filler myself to fix the issue. Following the steps above, I thoroughly cleaned the crack and prepared it by slightly widening it. Then, using a caulking gun, I applied the concrete crack filler, ensuring that the crack was completely filled. After smoothing the surface with a putty knife, I let the crack filler dry overnight. To my delight, the crack was perfectly sealed, and I no longer experienced any water leakage in my basement. Applying concrete crack filler was a simple and effective solution to fix the issue, and I was glad I could do it myself.
To achieve a smooth and finished surface during concrete basement floor repair, follow these steps:
In the late 1800s, the technique of smoothing and finishing surfaces became an essential part of concrete construction. This method revolutionised the building industry by providing durable and visually appealing structures. Through continuous advancements, construction workers and engineers perfected their skills in creating smooth and flawless concrete surfaces, contributing to the development of modern architecture. Today, the techniques for smoothing and finishing surfaces have evolved, incorporating innovative tools and materials to achieve impeccable results. The artistry and precision required in this process demonstrate the commitment and expertise of professionals in creating functional and aesthetically pleasing concrete structures. The history of smoothing and finishing surfaces highlights the ingenuity and dedication of those involved in the construction industry, shaping the urban landscape we admire today.
To repair shrinkage and settlement cracks in your basement floor, it is important to know the appropriate repair methods. This section provides a step-by-step guide on how to address these cracks. We will start by identifying the causes of the cracks and then explore different techniques that can be used, such as epoxy or polyurethane injections for larger cracks. Additionally, we will discuss the application of concrete patching compound as an effective solution. Let’s get ready to restore your basement floor to its former glory!
To repair shrinkage and settlement cracks in your basement floor, it is important to know the appropriate repair methods. This section provides a step-by-step guide on how to address these cracks. We will start by identifying the causes of the cracks and then explore different techniques that can be used, such as epoxy or polyurethane injections for larger cracks. Additionally, we will discuss the application of concrete patching compound as an effective solution. Let’s get ready to restore your basement floor to its former glory!
Identifying the cause of cracks is a crucial step in repairing concrete basement floors. By understanding the underlying factors that contribute to crack formation, you can address the root causes and prevent further damage. Here are the steps to identify the cause of cracks:
By following these steps, you can accurately identify the cause of cracks in your concrete basement floor and take appropriate measures to repair and prevent future damage.
When it comes to dealing with larger cracks in your basement floor, using epoxy or polyurethane injection can be an effective solution. Here are the steps to follow:
List prompts and instructional articles can be helpful, but nothing compares to a real-life example. Just ask John, who had a basement with several large cracks. Following the recommended steps, he used epoxy injection to repair the cracks, ensuring a strong and durable basement floor. Thanks to this method, John was able to prevent further damage and maintain the integrity of his basement for years to come.
When it comes to applying concrete patching compound to repair cracks and damage in a basement floor, follow these steps:
By following these steps, you can effectively apply the concrete patching compound to repair cracks and damage in your basement floor. Remember to take necessary safety precautions and carefully follow the manufacturer’s instructions for a successful repair.
When addressing spalling damage in your basement floor, there are a couple of key steps to focus on. The first step is removing any loose or damaged concrete from the affected area. This sets the stage for the next sub-section, where we discuss the process of repairing the surface using concrete resurfacer. By following this expert guidance, you’ll be able to effectively tackle spalling damage and restore the integrity of your basement floor.
To start removing loose or damaged concrete, follow these steps:
By following these steps, you can effectively remove loose or damaged concrete from your basement floor. Remember to always prioritise safety by wearing appropriate protective gear, such as goggles and gloves, during the repair process.
For a more efficient and durable repair, consider consulting with a professional contractor who specialises in concrete floor repairs. They can provide expert advice and ensure the job is completed to a high standard.
To repair the surface of your concrete basement floor, follow these steps using concrete resurfacer:
Concrete resurfacer has been used for many years as an effective solution to repair damaged or worn concrete surfaces. It was initially developed to extend the life of existing concrete structures and provide a cost-effective alternative to replacing entire floors. Over time, advancements in the formulation of concrete resurfacer have improved its durability and enhanced its ability to adhere to different surfaces. Today, it is commonly used in various applications, including basement floor repairs, driveways, walkways, and garage floors. Its ease of use and quick drying time make it a popular choice for DIY enthusiasts and professionals alike. By following the proper steps and using concrete resurfacer, you can easily restore the appearance and functionality of your basement floor, ensuring a long-lasting and reliable surface for years to come.
Here are some helpful tips for preventing future damage to your basement floor:
Following these tips for preventing future damage can help maintain the integrity and longevity of your basement floor.
To repair concrete cracks in your basement floor, start by determining the type of crack you have. Hairline cracks and shrinkage cracks are non-structural and can be repaired using concrete crack fillers. Settlement cracks may require leveling the floor or re-pouring the concrete. For heaved cracks, it is important to fix the underlying issue causing the heaving and then re-pour the floor. Perimeter cracks can be sealed with caulking. Spalling, pop-outs, and flaking can be repaired using suitable repair products.
The common types of cracks found in basement floors include hairline cracks, shrinkage cracks, settlement cracks, heaved cracks, perimeter cracks, and spalling, pop-outs, and flaking. Hairline cracks are non-structural and can be repaired or left alone. Shrinkage cracks occur during the curing process and can be easily repaired. Settlement and heaved cracks may require more extensive repairs depending on their severity.
Depending on the type and extent of the repair job, you may need tools such as a circular saw with a diamond blade, a cold chisel, masking tape, and digger buckets. Common materials for concrete crack repair include concrete crack fillers, joint sealant material, polymer modified cement, twin pack epoxy, and cement mix.
To repair basement floor cracks with an expansion joint, start by ensuring the surface is clean and dry. Then, use joint sealant material that can withstand wear and tear. Pour the resin carefully, using masking tape to achieve a neat finish. Excess material should be cut off before the resin fully cures.
No, not all basement floor cracks are a structural concern. Hairline cracks and shrinkage cracks are generally non-structural and can be repaired or left alone. However, settlement cracks and heaved cracks may indicate underlying structural issues and may require more extensive repairs or re-pouring of the concrete floor.
Some common causes of basement floor cracks include the lack of sawed contraction joints, settlement of the sub-base, pouring the concrete too wet, inadequate drainage, extreme weather, improper curing, and the addition of too much calcium chloride. It is important to address these factors when repairing basement floor cracks to ensure long-term durability.
Cleaning and maintenance are essential for keeping epoxy floors in optimal condition and preserving their aesthetic appeal. Epoxy floors, known for their durability and resistance to chemicals, are a popular choice for industrial, commercial, and residential spaces. This comprehensive guide offers expert tips to help you effectively clean and maintain your epoxy floors.
Epoxy floors are seamless and glossy coatings made of epoxy resin and hardeners. They provide a smooth, durable, and attractive surface that can withstand heavy foot traffic, impacts, and chemical spills. Epoxy floors are known for their high-gloss finish, easy maintenance, and long-lasting performance.
There are different types of epoxy floors available, each with its own unique characteristics and uses:
1. Self-dispersing epoxy floors are suitable for heavy-duty environments with high traffic and potential for forklifts or machinery.
2. Self-dispersing with quartz epoxy floors offer enhanced slip resistance with the addition of quartz granules.
3. Mortar epoxy floors are highly resistant to chemical and physical damage, making them suitable for industrial settings.
4. Epoxy terrazzo floors are decorative and durable, ideal for commercial spaces requiring an aesthetically pleasing flooring option.
5. Epoxy flake floors offer a decorative look with the addition of vinyl flakes, providing texture and visual interest.
6. Epoxy anti-static floors are designed to control static electricity, making them suitable for sensitive environments like laboratories or electronics manufacturing facilities.
7. Epoxy gravelled floors provide a textured surface, suitable for outdoor applications or areas where slip resistance is essential.
To ensure the longevity and appearance of your epoxy floors, regular cleaning is crucial. Here are some cleaning tips:
1. Regular sweeping and dusting help remove loose dirt and debris.
2. Mopping with warm water and mild detergent can effectively clean the surface.
3. Removing stains with gentle cleaners specific to epoxy floors is recommended.
4. Avoiding abrasive cleaners or scrub brushes helps prevent damage to the epoxy coating.
5. Dealing with oil and grease stains promptly using absorbent materials and appropriate cleaners is essential.
6. Implementing preventive measures, such as using mats and ensuring proper footwear, helps minimize dirt and damage to the floors.
In addition to cleaning, proper maintenance practices are vital to extend the lifespan of your epoxy floors. Here are some maintenance tips:
1. Regularly inspecting the floors for damages allows for timely repairs.
2. Repairing cracks and chips promptly to prevent further deterioration.
3. Keeping furniture and heavy objects on protective pads or using proper wheel casters to prevent scratching or indentation.
4. Avoiding heavy traffic or using protective measures in vulnerable areas helps maintain the integrity of the floors.
5. Applying topcoat sealants periodically to enhance the floor’s durability, gloss, and resistance to stains.
6. Considering professional maintenance and reapplication when necessary for a comprehensive rejuvenation of your epoxy floors.
By following these cleaning and maintenance tips, you can ensure that your epoxy floors remain in optimal condition, providing long-lasting durability and aesthetic appeal.
Epoxy floors are a type of flooring that consists of multiple layers of epoxy resin applied to a surface. Epoxy floors are made using epoxy resin, a durable and adhesive material that is commonly used in various applications. Epoxy floors are built up by applying multiple layers of epoxy resin onto the surface, which helps to create a strong and seamless flooring system. The epoxy resin undergoes a chemical reaction during the curing process, which results in a hard, durable, and glossy surface. Epoxy floors can be applied to different types of surfaces, including concrete, wood, and metal, making them suitable for various environments such as homes, garages, commercial spaces, and industrial facilities. Epoxy floors offer several advantages, such as high chemical resistance, easy maintenance, durability, and a smooth and glossy finish.
Fact: Epoxy floors can withstand heavy foot traffic and are resistant to stains, making them a popular choice for areas that experience high usage, such as warehouses, hospitals, and automotive showrooms.
Epoxy floors are a great choice for several reasons:
Discover the various types of epoxy floors that can transform your space. From self-dispersing epoxy floors to epoxy terrazzo floors and more, we will explore the unique characteristics and benefits of each. Whether you are looking for durability, aesthetics, or specialized properties such as anti-static capabilities, there is an epoxy floor option that suits your needs. So, let’s delve into the fascinating world of self-dispersing, quartz, mortar, terrazzo, flake, anti-static, and gravelled epoxy floors and find the perfect fit for your space.
Fun Fact: Self-dispersing epoxy floors are a cost-effective option for commercial establishments with high traffic volumes. They offer both aesthetic appeal and durability, reducing the need for costly replacements.
It’s interesting to note that epoxy has been used for flooring since the early 1900s. Initially popular in industrial settings for its strength and durability, epoxy floors have evolved over time to become more versatile and aesthetically appealing. Today, self-dispersing with quartz epoxy floors are highly sought after for both commercial and residential spaces, providing a visually appealing environment with a strong and durable flooring solution.
Mortar epoxy floors are a popular choice for various commercial and industrial spaces due to their durability and versatility. Here are some key facts about mortar epoxy floors:
Epoxy flooring has a long history dating back to the early 20th century when it was first developed for industrial applications. Over the years, advancements in technology and materials have led to the development of various types of epoxy floors, including mortar epoxy floors. Today, these floors are widely used in commercial and industrial spaces worldwide, offering a combination of strength, durability, and aesthetic appeal.
Epoxy Terrazzo Floors are a type of flooring that provides a durable and visually appealing surface suitable for various commercial and residential spaces. Here are some important facts to consider:
By following these maintenance and cleaning practices, epoxy terrazzo floors can maintain their polished appearance and offer a visually appealing environment in commercial establishments or residential spaces.
are a popular type of flooring that offers both durability and aesthetic appeal. These floors are created by embedding coloured flakes into an epoxy resin base, resulting in a unique and visually stunning finish. Here are some key points to consider when it comes to epoxy flake floors:
1. Enhanced Performance: Epoxy flake floors are known for their strong and resilient nature. They can withstand heavy machinery, high traffic volumes, and wear and tear, making them ideal for industrial spaces and commercial establishments.
2. Easy Maintenance: Epoxy flake floors are easy to maintain and require regular cleaning routines to keep them looking their best. Using a soft bristle broom or a gentle brush attachment on a vacuum machine can help reduce dirt and debris on the surface.
3. Avoid Abrasive Cleaners: It is important to avoid using harsh chemical cleaners or abrasive tools on epoxy flake floors as they can cause damage or surface abrasions. Instead, opt for a pH neutral cleaner or mild soap diluted in warm water to clean regularly.
4. Minimize Repairs: By following proper floor care techniques and taking preventive measures, such as using furniture pads and avoiding heavy traffic in vulnerable areas, you can minimize the need for repairs and costly replacements.
5. Attractive Finish: Epoxy flake floors offer an attractive and polished masterpiece to any space. The coloured flakes add depth and dimension, creating a visually appealing environment.
Epoxy flake floors are a resilient type of flooring that is easy to maintain and offers an attractive finish. By following a consistent cleaning routine and taking proper protective measures, you can enjoy clean and well-maintained epoxy flake floors for years to come.
Epoxy anti-static floors are a beneficial choice for commercial and industrial settings. Here are some key points to consider:
Epoxy gravelled floors are a popular choice for many commercial and industrial spaces due to their durability and attractive finish.
By following these maintenance tips, epoxy gravelled floors can maintain their attractive appearance and provide a visually appealing environment in commercial and industrial spaces.
When it comes to maintaining the beauty and longevity of your epoxy floors, it is crucial to have knowledge of the correct cleaning techniques. In this section, we will discuss various cleaning tips that will assist you in achieving this. These tips include regular sweeping and dusting, mopping with a gentle detergent, avoiding abrasive cleaners, and dealing with stubborn stains such as oil and grease. Let us now begin the process of keeping your epoxy floors gleaming and spotless.
Regular sweeping and dusting are essential for maintaining epoxy floors. Here are some tips to keep your floors clean:
Regular sweeping and dusting are simple yet effective maintenance routines for epoxy floors. By incorporating these steps into your cleaning routine, you can minimize the need for repairs and prolong the life of your epoxy floor.
In ancient times, before the advent of modern flooring materials, people also understood the importance of keeping their floors clean. In fact, the ancient Romans were known for their cleanliness and hygiene practices, which extended to their floors. They would regularly sweep and dust their floors using brooms made from natural materials, ensuring that their living spaces were not only visually appealing but also free from dirt and debris. This tradition of regular sweeping and dusting has been passed down through the centuries, and it continues to be an important part of maintaining clean and well-maintained floors, including epoxy floors. So, the next time you pick up a broom to sweep your epoxy floor, remember that you are following in the footsteps of ancient traditions that recognized the importance of a clean and tidy living environment.
Mopping with warm water and mild detergent is an effective way to clean and maintain epoxy floors. Follow these steps for best results:
Pro-tip: To maintain the shine and durability of the epoxy floor, avoid using harsh chemical cleaners or abrasive tools. Stick to mild detergents and soft bristle brooms for regular cleaning routines. By following these simple steps, you can keep your epoxy floor looking clean and beautiful for years to come.
When it comes to removing stains from epoxy floors, it is important to use gentle cleaners to avoid damaging the surface. Follow these steps to effectively remove stains without causing harm:
By following these steps and using gentle cleaners, you can effectively remove stains from your epoxy floor without causing any damage or affecting its appearance.
To maintain the quality and appearance of your epoxy floors, it is important to avoid using abrasive cleaners. These cleaners can cause surface abrasions and damage the protective sealant on the floors, leading to expensive repairs or replacements.
Instead of abrasive cleaners, choose a pH neutral cleaner or a mild soap. These gentle cleaners are effective in removing dirt and stains without causing any harm to the epoxy surface. For tougher stains, diluted ammonia can also be used, but be sure to follow the manufacturer’s instructions for proper dilution.
When cleaning your epoxy floors, always use a soft bristle broom or a microfiber floor mop to minimize the risk of scratching. Avoid harsh chemical cleaners or scrub brushes, as they can strip away the protective finish and leave your floors vulnerable to wear and tear.
Pro-tip: Regularly clean your epoxy floors using warm water and a mild detergent solution. This will help reduce dirt and debris buildup and maintain the attractive finish of your floors.
By avoiding abrasive cleaners and following proper floor care techniques, you can preserve the beauty and integrity of your epoxy floors for years to come.
When it comes to dealing with oil and grease stains on epoxy floors, it can be quite challenging. However, with the right steps and products, you can effectively remove these stains. Here are the steps you can follow:
Remember to always follow the manufacturer’s instructions when using cleaning products on epoxy floors. Taking preventive measures such as regular cleaning and prompt removal of oil or grease spills can help minimize the occurrence of stains.
Preventive measures are essential for maintaining the quality and longevity of epoxy floors. Here are some important preventive measures to consider:
By following these preventive measures, you can ensure that your epoxy floor remains clean, visually appealing, and in good condition for years to come.
To ensure the longevity and maintain the pristine appearance of your epoxy floors, it is essential to follow these maintenance tips. This comprehensive guide covers regular inspections, repairing cracks and chips, protecting furniture and heavy objects, minimizing traffic in vulnerable areas, applying topcoat sealants, and the importance of professional maintenance. By giving your epoxy floors the care they deserve, you can say goodbye to dull and damaged floors and hello to a clean and flawless surface.
To ensure the longevity and maintain the pristine appearance of your epoxy floors, it is essential to follow these maintenance tips. This comprehensive guide covers regular inspections, repairing cracks and chips, protecting furniture and heavy objects, minimizing traffic in vulnerable areas, applying topcoat sealants, and the importance of professional maintenance. By giving your epoxy floors the care they deserve, you can say goodbye to dull and damaged floors and hello to a clean and flawless surface.
Regular inspection for damages is essential to maintain the longevity and efficiency of epoxy floors.
Pro-tip: Use a torchlight during the inspection to ensure that no damages are missed, especially in areas with poor lighting.
To repair cracks and chips in epoxy floors, follow these steps:
Sarah had epoxy floors installed in her garage, but over time, she noticed a few cracks and chips in the surface. She followed the steps above to repair the damage. After cleaning and preparing the area, she filled in the cracks and chips with an epoxy patching compound. Once the repairs had cured, she sanded the area to create a seamless finish. Sarah was thrilled with the results and relieved that she didn’t have to go through the expense and hassle of replacing the entire floor. With proper maintenance, her epoxy floors continued to provide a strong and attractive surface for her garage.
When it comes to keeping furniture and heavy objects protected on epoxy floors, there are a few important considerations to keep in mind:
By taking these protective measures, you can help preserve the beauty and integrity of your epoxy floors while keeping your furniture and heavy objects safe from unnecessary damage.
To maintain the durability and appearance of epoxy floors, it is crucial to avoid heavy traffic in vulnerable areas.
By following these steps, you can reduce the risk of damage and maintain the longevity of your epoxy floors by avoiding heavy traffic in vulnerable areas.
For the longevity and durability of your epoxy floors, it is essential to apply topcoat sealants. Here are the steps to follow:
Applying topcoat sealants to epoxy floors enhances their appearance and provides added protection against wear and tear. Sealants create a barrier that helps prevent scratches, stains, and surface abrasions, ensuring your epoxy floors maintain their attractive finish for years to come.
Professional maintenance and reapplication of epoxy floors is crucial for their long-term durability and appearance. To ensure optimal condition, follow these six steps:
Pro-tip: In between professional maintenance, clean the epoxy floor regularly using a mild soap and warm water solution. Avoid using harsh chemical cleaners or abrasive tools, as these can damage the surface. Instead, use a soft bristle broom or a microfiber floor mop with a gentle cleaning solution to minimize repairs and maintain the floor’s strong finish.
The best practices for cleaning and maintaining epoxy floors include regular cleaning with mild soap and water or pH-neutral cleaners, avoiding abrasive cleaners, using mats or rugs to reduce debris, and promptly repairing any damaged areas.
To keep your epoxy floors looking pristine and polished, it is important to invest time and effort in regular cleaning and maintenance. This includes daily cleaning in high foot traffic areas, immediate stain removal, and regular sealing to protect the surface from damage.
Yes, there are seasonal considerations for cleaning epoxy floors. In areas with harsh winters, it is important to remove any snow or ice promptly to prevent damage to the surface. Additionally, during rainy seasons, it is important to clean and dry the floors regularly to reduce the risk of slipping or mold growth.
The cleaning and maintenance process for epoxy floors may vary depending on the setting. For garage floors, it is important to promptly clean up any car-related chemicals, such as oil or fuel, to prevent damage. Sunroom floors should be regularly swept and mopped to remove dust and debris, while warehouse floors with large machinery may require more frequent cleaning and the use of special cleaners.
While epoxy floors are relatively easy to clean and maintain, seeking professional assistance can provide you with the knowledge and guidance necessary to effectively preserve the beauty and longevity of your floors. Professional companies specializing in epoxy floor installation and maintenance can offer tailored solutions and recommendations.
To reduce debris and protect the surface of epoxy floors, it is recommended to use mats or rugs in entrance areas to trap dirt and dust. Regular sweeping or vacuuming with soft bristles can also help remove loose debris. Additionally, taking precautions to prevent large machinery or motor vehicles from scratching or damaging the floor is essential.
Bringing epoxy flooring indoors has become a popular choice for interior spaces due to its numerous benefits and appealing aesthetics. In this article, we will explore the advantages of using epoxy flooring inside, along with installation tips to ensure a successful application. We will address common concerns and answer frequently asked questions about interior epoxy flooring.
Epoxy flooring offers several advantages when used in interior spaces:
Epoxy flooring is highly durable and can withstand heavy traffic, making it ideal for high-use areas such as kitchens, living rooms, and hallways. It is resistant to stains, scratches, and chemicals, ensuring a long-lasting and resilient flooring option.
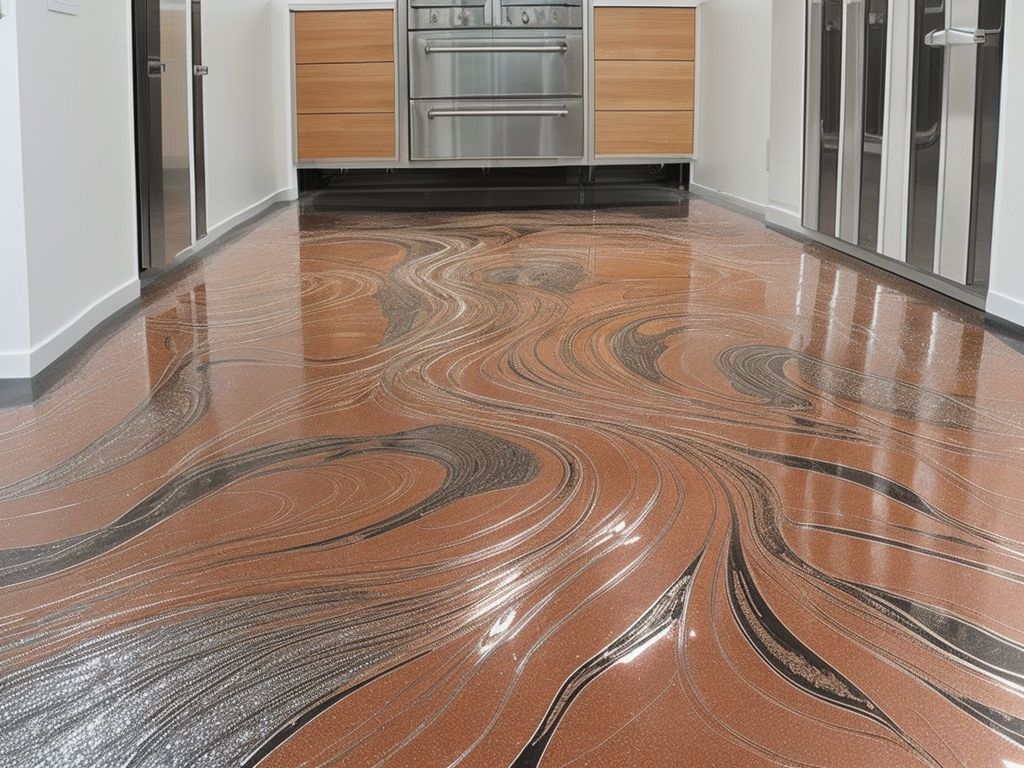
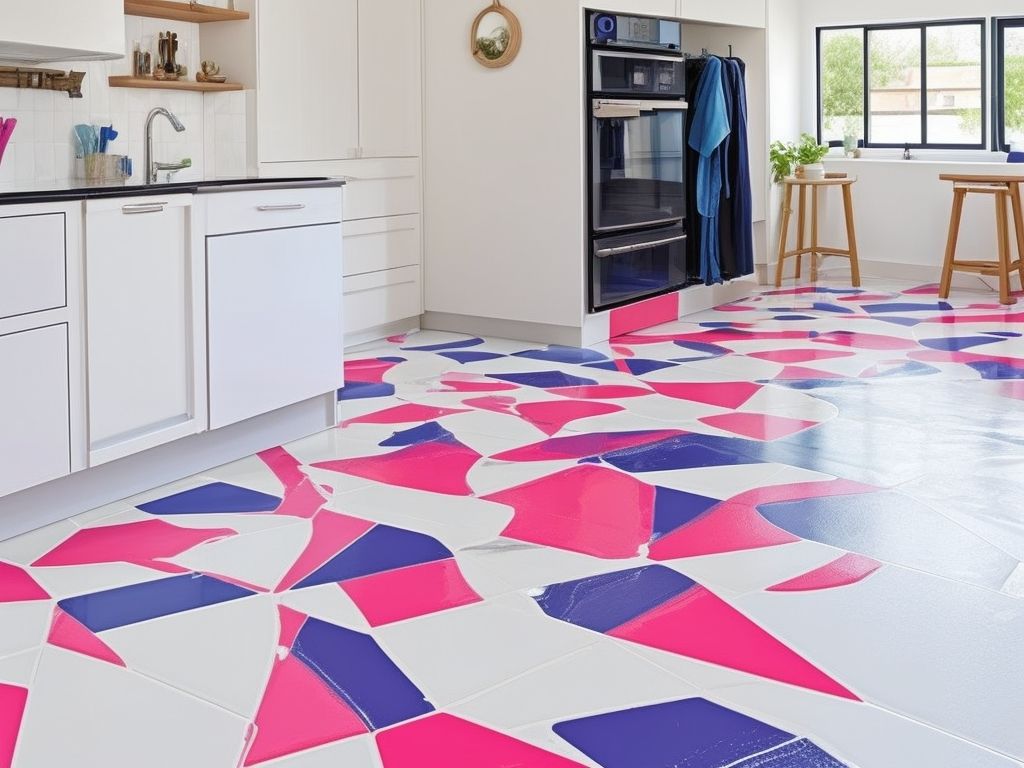
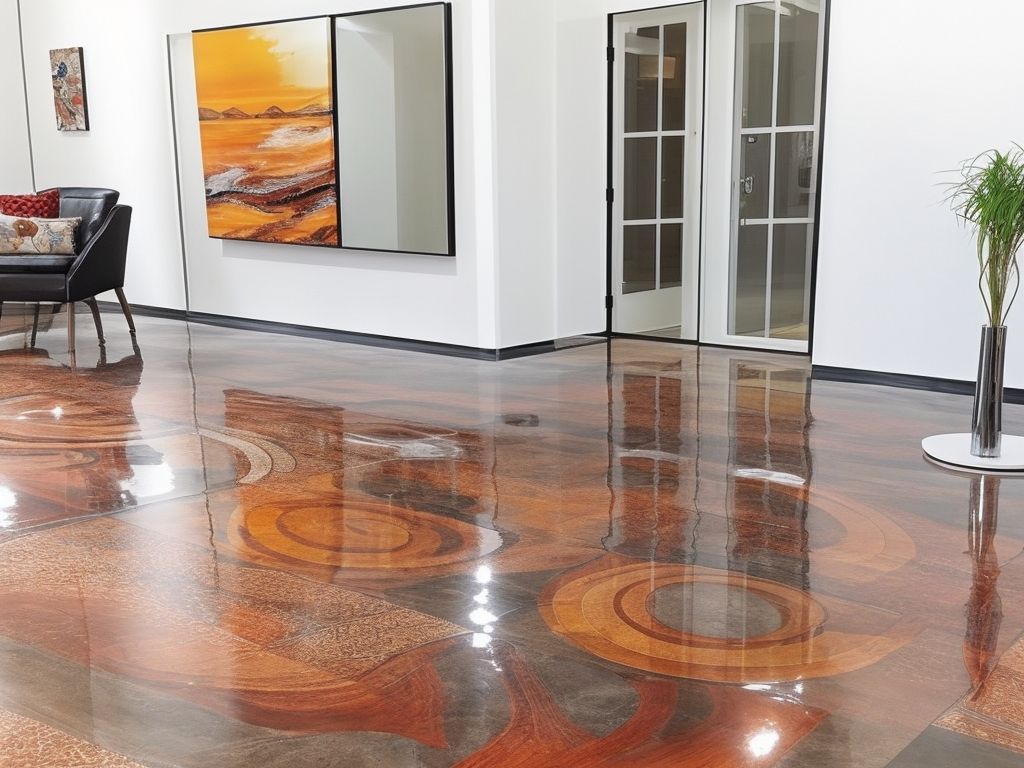
With a range of colors, patterns, and finishes available, epoxy flooring can transform the look of any interior space. Whether you prefer a sleek and modern design or a vibrant and artistic floor, epoxy coatings offer endless possibilities for customization.
Epoxy flooring is easy to clean and requires minimal maintenance. Its smooth and seamless surface prevents dirt, dust, and debris from accumulating, making it a hygienic choice for households and commercial spaces.
To ensure a successful installation of epoxy flooring in interior spaces, consider the following tips:
Proper surface preparation is vital for a strong bond between the epoxy coating and the substrate. This involves thorough cleaning, repairing any cracks or unevenness, and ensuring the surface is completely dry before application.
Selecting the appropriate epoxy coating for your specific interior requirements is crucial. Consider factors such as the level of foot traffic, exposure to chemicals or moisture, and the desired aesthetic effect when choosing the coating system.
Follow the manufacturer’s instructions and guidelines for mixing and applying the epoxy coating. Use proper techniques, such as applying the coating evenly and avoiding bubbles or unevenness, to achieve a smooth and professional finish.
Allow sufficient time for the epoxy coating to cure and harden before subjecting it to heavy use. Follow the recommended curing time provided by the manufacturer to ensure a durable and long-lasting floor.
To address any concerns or questions you may have about interior epoxy flooring, we’ve answered some frequently asked questions:
By understanding the benefits, following proper installation techniques, and addressing common concerns, you can confidently choose epoxy flooring for your interior spaces, creating a durable, visually appealing, and low-maintenance surface.
Bringing epoxy flooring inside has numerous benefits that are worth exploring. Its exceptional durability, longevity, aesthetic appeal, and low maintenance requirements make it a wise choice for interior spaces. Let’s delve into the advantages of bringing epoxy flooring inside and see how it can transform your space into a stylish and long-lasting haven.
Durability and longevity are important factors to consider when choosing epoxy flooring for interior spaces. Here are some key points about the durability and longevity of epoxy flooring:
A commercial facility decided to install epoxy flooring in their warehouse to improve durability and longevity. After years of heavy machinery operation and constant foot traffic, the epoxy flooring remained intact and showed no signs of wear or damage. The owners were impressed by the flooring’s incredible durability, saving them from the costly and time-consuming process of replacing the flooring multiple times over the years.
One of the key attributes of epoxy flooring is its aesthetic appeal. Here are some reasons why epoxy flooring can enhance the look of interior spaces:
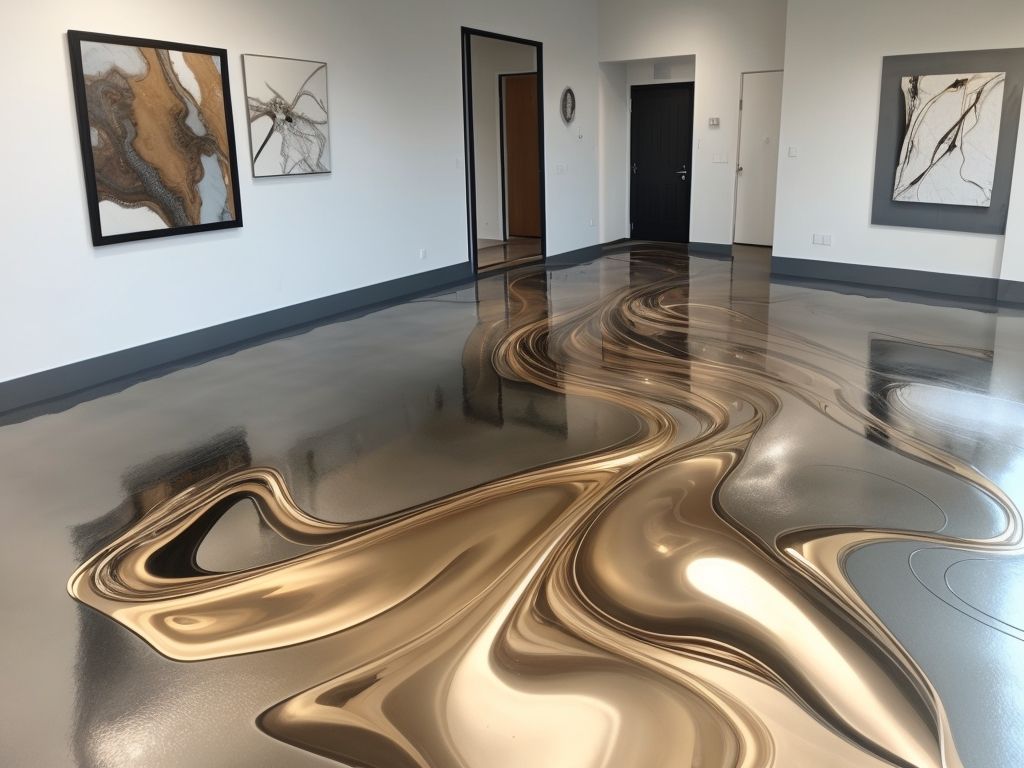
To further enhance the aesthetic appeal of epoxy flooring, you can consider incorporating decorative elements like metallic pigments, quartz aggregates, or decorative flakes for added texture and visual interest.
With its seamless finish, customizable designs, and a multitude of colour options, epoxy flooring can transform any interior space into a visually striking and appealing environment.
Low Maintenance
Epoxy flooring is known for its low maintenance requirements. Here are several reasons why epoxy flooring is easy to maintain:
Pro-tip: To keep your epoxy floor looking its best, promptly clean up any spills and avoid using abrasive cleaning products that can damage the surface. Regularly sweep or dust mop the floor to remove any loose dirt or debris. For a deeper clean, use a mild detergent and warm water to mop the floor. Avoid using excessive amounts of water, as it can seep into the joints and cause damage over time.
Installation Tips for Interior Epoxy Flooring
When it comes to installing epoxy flooring in your interior spaces, it is crucial to have the right tips and techniques. In this section, we will provide you with the necessary information for installing epoxy flooring indoors. We will cover surface preparation, selecting the ideal epoxy coating, application techniques, and important factors such as time and the curing process. Let’s get started and transform your interior floors!
Surface preparation is an essential step when installing interior epoxy flooring. It is important to properly prepare the surface to ensure maximum adhesion and a long-lasting finish. Here are the key steps to follow:
By following these surface preparation steps, you can ensure that your interior epoxy flooring will adhere properly and provide a durable and long-lasting finish.
Historically, surface preparation has been a vital part of various construction processes. In ancient times, builders would meticulously clean and prepare the surfaces before applying materials such as plaster or paint. This ensured that the finishes would adhere properly and withstand the test of time. Today, surface preparation remains just as important, especially when it comes to installing interior epoxy flooring. By taking the time to clean, repair, etch, and prime the surface, you are setting the foundation for a successful and lasting installation. So, next time you embark on a flooring project, remember the importance of surface preparation, and you’ll be rewarded with a beautiful and durable floor.
When selecting the appropriate epoxy coating for your interior space, there are several important factors to take into consideration. The following table presents some significant considerations that can assist you in making an informed decision:
| Type of Epoxy | Features |
| Water-based epoxy | – Low odour – Easy to clean – Environmentally friendly |
| Solvent-based epoxy | – High durability – Excellent chemical resistance – Fast curing |
| Epoxy terrazzo | – Decorative and customisable – Durable and long-lasting – Seamless finish |
| Epoxy mortar | – High impact resistance – Suitable for heavy traffic areas – Excellent adhesion |
| Metallic epoxy | – Unique, iridescent appearance – Highly reflective finish – UV resistant |
When choosing the right epoxy coating, take into account the specific requirements of your space. If you require a coating that is resistant to chemicals or heavy traffic, a solvent-based or epoxy mortar option may be suitable. For areas where aesthetics are important, such as lobbies or showrooms, epoxy terrazzo or metallic epoxy can provide a visually stunning finish. Water-based epoxy is a good choice for areas where low odour and easy clean-up are important factors.
Remember to consult with a professional and consider the conditions in which the epoxy coating will be applied. Proper surface preparation and application techniques are crucial for a successful installation.
Select the appropriate epoxy coating to enhance the durability and aesthetic appeal of your interior space.
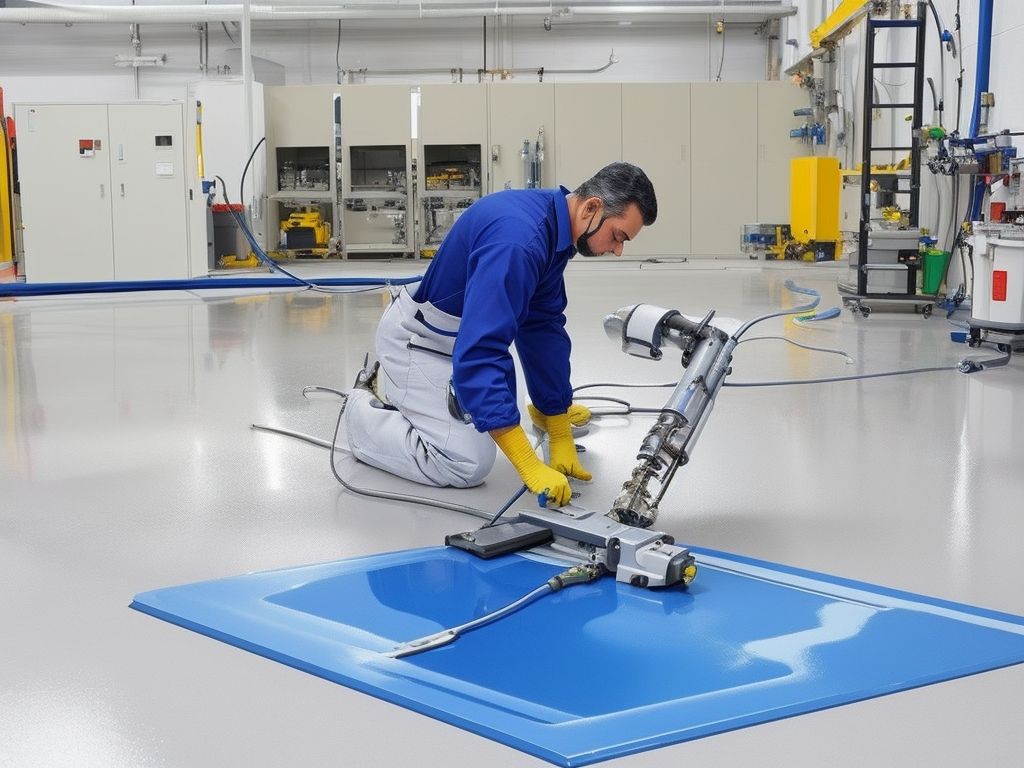
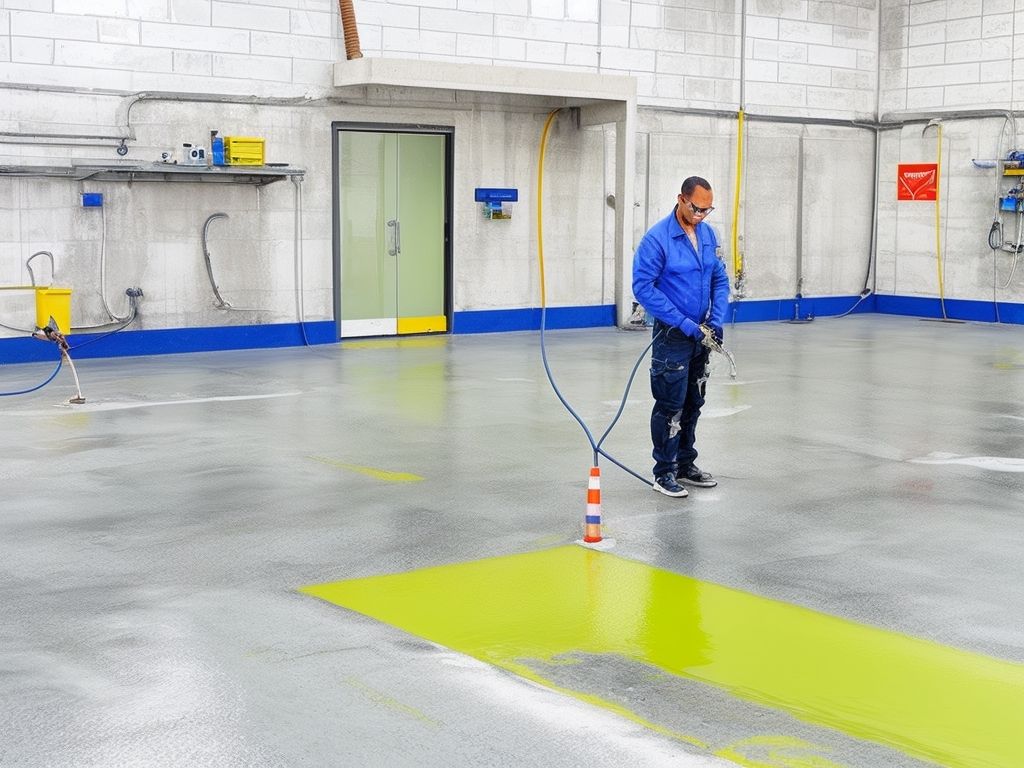
When applying epoxy flooring in interior spaces, it is important to follow proper application techniques to ensure a successful and long-lasting result. Here are the steps to properly apply epoxy flooring:
By following these proper application techniques, you can ensure that your interior epoxy flooring is applied correctly and will provide lasting beauty and functionality.
The time and curing process for epoxy flooring is an important step in ensuring its durability and effectiveness. It is crucial to follow these steps carefully to achieve the desired results.
| Step | Description |
| 1 | Application |
| 2 | Mixing epoxy components together |
| 3 | Spreading the mixture evenly on the floor |
| 4 | Allowing the epoxy coating to cure |
| 5 | Monitoring the curing time |
| 6 | Avoiding foot traffic or any other activities on the floor during the curing process |
| 7 | Providing proper ventilation for quicker curing |
| 8 | Waiting for the recommended curing time before subjecting the floor to heavy usage or placing furniture on it |
During the time and curing process, it is crucial to maintain the recommended temperature and humidity levels for optimal results. Failure to do so can compromise the integrity of the epoxy coating and result in a less durable finish.
Fact: The curing time for epoxy flooring can vary depending on factors such as temperature, humidity, and the specific product used. It is essential to carefully follow the manufacturer’s instructions for the best outcomes.
Epoxy flooring is not slippery when installed and maintained correctly. The slipperiness of epoxy flooring can be reduced by adding additives or aggregates to the epoxy coating, which create texture on the surface and improve traction. The level of slip resistance can be adjusted to suit the specific requirements of the space.
The slipperiness of epoxy flooring can also depend on the location and conditions it is exposed to. For instance, areas that are frequently wet or oily are at a higher risk of slipping. In such cases, it is important to choose an epoxy coating with a higher level of slip resistance.
Regular cleaning and maintenance are essential for maintaining the slip resistance of epoxy flooring. Any spills or liquids should be promptly cleaned up to prevent slippery surfaces. Regular sweeping and mopping can also help remove dirt or debris that may make the surface slippery.
To ensure the appropriate level of slip resistance for your specific needs, it is advisable to consult with a professional epoxy flooring installer. They can take into account factors such as the location, environment, and maintenance requirements to ensure that your epoxy flooring is safe and slip-resistant.
Epoxy flooring can be installed over existing floors. The process involves thoroughly cleaning and preparing the existing floor surface to ensure proper adhesion of the epoxy coating. This may include removing any existing sealers or coatings, repairing any cracks or damage, and leveling the floor if necessary.
Once the surface is properly prepared, a primer is applied to enhance adhesion. Then, the epoxy coating is applied in multiple layers, allowing each layer to cure before applying the next. This creates a strong and durable flooring surface that is seamless and easy to maintain.
It is important to note that the viability of installing epoxy flooring over existing floors depends on the condition of the existing floor. If the existing floor is in good condition and free of major issues, such as excessive moisture or structural problems, then epoxy flooring can be a suitable option.
Epoxy flooring can be installed over existing floors with proper preparation and application techniques. It is recommended to consult with a professional to assess the condition of the existing floor and determine the best course of action for installing epoxy flooring.
I recently renovated my basement and decided to install epoxy flooring over the existing concrete floor. After thoroughly cleaning and repairing the surface, I followed the proper application steps and applied the epoxy coating. The transformation was remarkable. The existing floor, which was dull and worn, was completely transformed into a glossy, seamless surface that enhanced the overall aesthetics of the space. Not only does the epoxy flooring provide a beautiful finish, but it is also highly durable and easy to clean, making it a perfect choice for my basement. I am thrilled with the results and would highly recommend epoxy flooring for anyone looking to upgrade their existing floors.
To maintain and clean epoxy flooring, the following steps should be followed:
By following these cleaning and maintenance steps, you can keep your epoxy flooring looking clean and well-maintained for years to come.
Although epoxy flooring can be DIY installed, it is important to carefully follow the instructions provided by the manufacturer to achieve the desired results. If you have any concerns or doubts about the installation process, it is recommended to consult a professional for assistance.
Yes, epoxy flooring is increasingly being used in residential interior spaces such as living rooms, dens, bathrooms, and interior hallways.
Epoxy flooring provides a range of benefits. It is ultra hard, seamless, waterproof, and durable. It also offers a modern look and comes in a wide range of color options.
The installation process for interior epoxy flooring is similar to painting. Floors are prepped and primed before the epoxy is applied, and then there is a curing period. The floors are dry to the touch and firm within twelve hours, with full strength and durability evident within a week.
Epoxy flooring is especially suitable for finished basements, easy care kitchens, and spa-like bathrooms. It works well in rooms with moisture issues and high traffic areas where scratching and staining are concerns.
Epoxy flooring offers more design options than tile flooring. It comes in a variety of hues, can be laid in artistic patterns, and can also be made to look like marble or granite with epoxy terrazzo flooring.
Despite its industrial uses, epoxy flooring is a viable option for residential use and offers many benefits for families, including durability, easy maintenance, and a modern aesthetic.
Beneath the Surface: Repairing a Drain Pipe Under Concrete
Understanding the Problem: Signs of a Damaged Drain Pipe
In older homes or properties with concrete foundations, drain pipes embedded beneath concrete can develop problems over time. Recognizing the signs of a damaged drain pipe is crucial for timely repairs. Common signs include slow draining sinks or toilets, foul odours, water stains on walls or floors, and unexpected pooling water. These issues indicate potential cracks, leaks, or blockages in the drain pipe, requiring immediate attention.
Assessing the Situation: How to Identify the Location and Extent of the Damage
When faced with a damaged drain pipe under concrete, it is vital to accurately identify its location and assess the extent of the damage before proceeding with repairs. Several methods can be employed to locate the affected drain pipe. Techniques such as pipe inspection cameras, acoustic equipment, or dye testing can aid in determining the precise location. Once located, assessing the extent of the damage can be done by using investigative tools, including moisture meters, thermal imaging, or testing for hydrostatic pressure.
Preparing for Repairs: Tools and Materials Needed
Repairing a drain pipe under concrete requires specific tools and materials to ensure a successful outcome. Essential tools include a jackhammer or concrete saw for accessing the damaged pipe, a pipe cutter or PVC saw for removing the damaged section, wrenches or pliers for securing pipe connections, and a blowtorch or heat gun for heat-welding PVC pipes. Materials such as replacement pipes, couplings, fittings, adhesive or primer, and concrete patching compound will be necessary for the repair process.
Repairing a drain pipe under concrete involves a systematic approach to ensure efficient and lasting repairs. The step-by-step process includes excavation of the damaged area, removing the damaged section of the pipe, preparing the replacement pipe, installing and securing the replacement, and finally, testing and ensuring the proper functionality of the repaired drain pipe. Following each step diligently is essential to ensure a successful repair without causing additional damage.
Professional Help: When to Call in the Experts
While some individuals may choose to tackle drain pipe repairs under concrete themselves, certain situations require the expertise of a professional plumber. Signs that indicate the need for professional assistance include extensive damage, complex plumbing systems, limited access to the damaged area, or lack of confidence in executing the repairs effectively. When seeking a reliable and experienced plumber, ensure they are licensed, have a positive reputation, and provide a warranty for their work.
By understanding the signs of a damaged drain pipe, assessing the situation accurately, preparing for repairs with the necessary tools and materials, following a step-by-step repair guide diligently, and knowing when to call in professional help, homeowners can effectively address drain pipe issues beneath concrete and restore proper functionality to their plumbing system.
Understanding the Problem: Signs of a Damaged Drain Pipe
A damaged drain pipe under concrete can cause significant problems if left untreated. It is important to understand the signs of a damaged drain pipe in order to address the issue promptly.
1. Slow drainage: If water takes longer to drain from sinks, showers, or toilets, it may indicate a damaged drain pipe. This can result from blockages or leaks in the pipe.
2. Foul odours: Unpleasant smells coming from drains or sewage can be a clear indication of a damaged drain pipe. The presence of sewer gas can be harmful to your health and should be addressed immediately.
3. Water stains or mould growth: Water stains on walls or ceilings, or mould growing in areas near drains or sewage pipes, may indicate a leak or damage in the drain pipe.
4. Foundation issues: Cracks or shifts in the foundation of your property can be caused by a damaged drain pipe. Excess water can weaken the soil beneath the concrete, leading to structural problems.
5. Puddles or pooling water: Standing water around your property, especially in areas near drains, can be a sign of a damaged drain pipe. This could indicate that water is not properly flowing through the pipes.
Recognising these signs can help you identify a damaged drain pipe and take appropriate action. If you notice any of these signs, it is advisable to consult a professional plumber to assess the problem and carry out necessary repairs.
There are several common signs that indicate a damaged drain pipe under concrete:
If you observe any of these signs, it’s important to address the issue promptly to avoid further damage to your plumbing system and property.
Assessing the situation: How to identify the location and extent of the damage
Pro-tip: If you are unsure about assessing the situation yourself, it is recommended to consult a professional plumber or a drainage specialist. They have the expertise and tools to accurately diagnose and assess the location and extent of the damage, ensuring a proper repair solution.
There are various methods available to locate a damaged drain pipe under concrete.
1. Visual inspection: By examining the area where the drain pipe is located, you may be able to identify signs of damage such as cracks or leaks in the concrete. This can give you an idea of the location and extent of the damage.
2. Drain cameras: Using drain cameras is an effective method for locating the damaged drain pipe. These cameras can be inserted into the drain system and provide a live video feed, allowing plumbers to pinpoint the exact location of the damaged pipe.
3. Drain cleaning equipment: In some cases, the use of drain cleaning equipment like drain snakes or hydro-jetting can help locate a damaged drain pipe. When the equipment encounters resistance or is unable to pass through a certain point, it may indicate a problem with the pipe.
4. Acoustic technology: Specialised acoustic devices can be used to determine the location of a damaged drain pipe under concrete. These devices use sound waves to identify changes in the density of the material, indicating where the pipe may be compromised.
5. Professional assistance: If you are unable to locate the damaged drain pipe using these methods, it is advisable to seek the help of a professional plumber. They have the experience and expertise to accurately locate and assess the damage to the drain pipe under concrete.
By employing these methods, you can effectively locate the damaged drain pipe under concrete and proceed with the necessary repairs.
To determine the extent of the damage to a drain pipe under concrete, there are several techniques that can be used:
By employing these techniques, the extent of the damage to a drain pipe under concrete can be assessed effectively. This knowledge is crucial in planning the necessary repairs and ensuring the proper restoration of the drain system.
When preparing for repairs to a drain pipe under concrete, it is important to gather the necessary tools and materials. This will ensure a smooth and successful repair process.
By gathering these tools and materials, you will be well-prepared to tackle the repair of a drain pipe under concrete efficiently and effectively.
When repairing a drain pipe under concrete, you will need several tools to ensure a successful repair:
When using these tools, it is important to follow safety guidelines and wear protective gear such as gloves and goggles.
Remember to always consult a professional if you are unsure about the repair process or if you encounter any difficulties.
To complete the repair of a drain pipe under concrete, you will need the following materials or products:
1. Epoxy putty: This versatile adhesive is used to seal leaks and cracks in the drain pipe.
2. PVC primer and cement: These are necessary for connecting PVC pipes and fittings securely.
3. Pipe cutter: This tool is essential for cutting through the damaged section of the drain pipe.
4. Pipe wrench: Used to grip and turn pipes, the wrench is required for loosening and removing sections of the drain pipe.
5. Pipe fittings: Depending on the specific repair needed, you may require couplings, elbows, or tees to connect new sections of the drain pipe.
6. Backfill material: After replacing the damaged section of the drain pipe, backfill material such as gravel or soil is used to cover and support the pipe.
7. Safety equipment: It’s important to have gloves and safety goggles to protect yourself while working with the materials and tools.
Remember to assess the specific requirements of your repair project before purchasing the materials. Consult with a professional if you are unsure about the correct materials or if the damage is extensive.
Fact: According to the Environmental Protection Agency (EPA), leaking pipes in households can waste up to 10,000 gallons of water annually, which is equivalent to the water needed to wash 270 loads of laundry.
Step-by-Step Repair Guide: Fixing a Drain Pipe Under Concrete
By following these steps, you can successfully fix a drain pipe under concrete.
To repair a drain pipe under concrete, follow these steps:
1. Begin by identifying the location of the damaged drain pipe. This can be done by using a pipe locator or through careful inspection of the area.
2. Once you have located the damaged section, mark the area to ensure precision during the repair process.
3. Prepare the tools needed for the repair, which may include a jackhammer, chisel, channel locks, and a pipe cutter.
4. Use the jackhammer and chisel to carefully break the concrete around the damaged pipe section. Take caution not to cause further damage to the surrounding area.
5. Once the damaged pipe section is exposed, use the pipe cutter to remove the damaged part. Ensure a clean and smooth cut for proper fitting of the new pipe.
6. Prepare the replacement pipe by measuring and cutting it to the correct length. Make sure it fits securely with the existing pipe sections.
7. Connect the replacement pipe to the existing pipe using appropriate connectors or couplings.
8. Test the repaired section by running water through the drain pipe. Check for any leaks or signs of improper connections.
9. Once you have confirmed that the repair is successful, cover the repaired section with new concrete and allow it to properly cure.
10. Clean up the work area and dispose of any debris or waste materials.
By following these steps, you can effectively repair a drain pipe under concrete and ensure proper functioning of your drainage system. Remember to always prioritize safety and consider seeking professional help if necessary.
Calling in the experts for professional help is essential when dealing with complex tasks like repairing a drain pipe under concrete. Here are a few instances when you should consider seeking expert assistance:
1. Extensive damage: If the drain pipe has significant damage, such as cracks, leaks, or collapses, it’s best to call in professionals. They have the knowledge and tools to accurately assess the situation and provide effective solutions.
2. Lack of experience: Unless you have prior experience with drain pipe repairs, it’s advisable to leave it to the experts. They are trained in handling such repairs and can ensure the job is done correctly, minimizing the risk of further damage.
3. Time constraints: Professionals can complete the repair efficiently, saving you valuable time. They have the necessary expertise and resources to complete the task promptly, allowing you to focus on other important matters.
4. Safety concerns: Repairing a drain pipe under concrete can involve working tight spaces or dealing with hazardous materials. Professional plumbers have the necessary safety equipment and protocols to ensure the job is done safely without compromising your well-being.
5. Long-term benefits: By hiring experts, you can have peace of mind knowing that the repair work is of high quality and will last for years to come. They can also provide valuable advice on maintenance and preventive measures to avoid future issues.
In a similar vein, my neighbour recently faced a drain pipe repair under their concrete driveway. Despite their initial attempt to fix it themselves, the issue persisted. Realising the complexity of the task, they eventually decided to call in professional plumbers. The experts quickly identified the root cause of the problem and implemented a durable solution. Thanks to their knowledge and expertise, the drain pipe is now functioning properly, preventing any further damage to the property.
When it comes to a damaged drain pipe under concrete, there are specific signs that indicate the need for professional assistance. These signs include persistent clogs and backups, foul odours coming from drains, slow drainage in multiple fixtures, and visible signs of water damage such as mould or discolouration. These indicators suggest that the damage to the drain pipe is significant and requires the expertise of a professional plumber to assess and repair the problem.
It is important not to ignore these signs as they can lead to more extensive damage and costly repairs if left untreated. Professional assistance is necessary to accurately identify the location and extent of the damage using advanced techniques and specialised equipment. Experienced plumbers can provide the necessary tools and materials needed for the repair, ensuring a thorough and long-lasting fix.
Choosing a reliable and experienced plumber for repairing drain pipes under concrete is crucial. Look for professionals who are licensed, insured, and have a good reputation in the industry. Reading customer reviews and obtaining recommendations can help in making an informed decision. It is also important to consider the plumber’s expertise in handling similar projects and their ability to communicate clearly and provide a detailed repair plan.
By recognising the signs that indicate the need for professional assistance and choosing the right plumber, you can ensure timely and effective repairs for your damaged drain pipe under concrete.
When selecting a reliable and experienced plumber to repair drain pipes under concrete, it is important to follow these steps:
###Reference Data (Source: Our Team):
Source: https://www.youtube.com/watch?v=LFIcRlAOFw0 – The information provided includes details about press, copyright, contact information, the creator, advertising, and development. – There is also information about canceling contracts, terms of use, privacy, policies, and safety guidelines. – The note mentions that YouTube is owned by Google LLC and provides a copyright notice for the year 2023.
Source: https://www.thereliningcompany.com.au/broken-pipes-under-a-concrete-slab-drain-signs-repair-options/ – Plumbing is an essential part of our homes that we often take for granted, but when pipes start to leak, it becomes a major concern. – Water damage can be disastrous if not addressed promptly, so it’s crucial to identify and fix broken pipes quickly. – Repairing pipes under concrete can be challenging, but there are methods available to address this issue. – Signs of a broken pipe under concrete include wet spots, cracks in the concrete, foul odors (especially sewage), dampness, mold or mildew, increased water bill, and unusual humidity indoors. – Indoor signs of broken pipes include overflowing drains, slow drainage in sinks and toilets, strange noises or smells from pipes, cracks in the house, dampness or mold, and damage to flooring materials. – If you suspect underground pipe damage, it’s important to consult a pipe relining professional. – Ignoring warning signs can lead to structural damage and expensive repairs. – Repairing underground concrete pipes with pipe relining is an innovative solution where a textile liner is placed within the existing pipe to repair cracks and damage. – Pipe relining is a permanent solution that doesn’t require digging, using keyhole technology. – The repair process involves pipe inspection using a specialized camera, pipe cleaning, and preparation to ensure the success of the relining. – PVC pipes may require sanding to create a suitable texture for the liner. – Pipe relining is an environmentally friendly and cost-effective solution for repairing damaged pipes under concrete.
Source: https://pipelt.com/sewer-repair/how-to-repair-sewer-lines-under-a-concrete-slab/ A broken sewer line underneath a concrete slab can be a major problem for homeowners and businesses. The traditional method of locating and repairing the break involves excavation, which can be costly and disruptive. However, Pipelining Technologies, Inc. offers a low-impact and streamlined solution through their trenchless pipelining method. The traditional method begins with locating the leaking pipe below the cement. Since cement is porous, it absorbs leaking water and causes visible signs such as wet or damp carpet, mildew or mold under flooring, and visible pools of water. Above-ground listening devices can help pinpoint the exact location of the leak. Once the leak is detected, excavation is done to access the broken pipe. This involves digging inside the house or under the perimeter, repairing or replacing the pipe, refilling the groundwork, relaying concrete, and reinstalling the flooring. This method is inconvenient, expensive, and can potentially damage the structural integrity of the house. In contrast, the trenchless pipelining method offered by Pipelining Technologies, Inc. is a more efficient and low-impact solution. It involves three steps: diagnostic video camera sewer pipe inspection, mechanical cleaning and descaling, and precision pipe lining with robotic branchline reinstatements. The process starts
Signs of a broken pipe under concrete include wet spots, cracks in the concrete, foul odors (especially sewage), dampness, mold or mildew, increased water bill, and unusual humidity indoors. Indoor signs of broken pipes include overflowing drains, slow drainage in sinks and toilets, strange noises or smells from pipes, cracks in the house, dampness or mold, and damage to flooring materials.
Ignoring warning signs can lead to structural damage and expensive repairs. Water damage from a leaky pipe can be disastrous if not addressed promptly.
Pipe relining is an innovative solution where a textile liner is placed within the existing pipe to repair cracks and damage. It is a permanent solution that doesn’t require digging, using keyhole technology. The process involves pipe inspection using a specialized camera, pipe cleaning, and preparation to ensure the success of the relining.
Yes, pipe relining is a cost-effective solution for repairing damaged pipes under concrete. It eliminates the need for costly excavation and labor costs associated with jackhammering concrete.
The trenchless pipelining method offered by Pipelining Technologies, Inc. is a low-impact and efficient solution. It involves three steps: diagnostic video camera sewer pipe inspection, mechanical cleaning and descaling, and precision pipe lining with robotic branchline reinstatements. It eliminates the inconvenience, high costs, and potential structural damage associated with traditional excavation methods.
The traditional method of locating and repairing a leak involves excavation, which can be costly and disruptive. However, Pipelining Technologies, Inc. offers a low-impact and streamlined solution through their trenchless pipelining method. This method involves diagnostic video camera sewer pipe inspection, mechanical cleaning and descaling, and precision pipe lining with robotic branchline reinstatements, without the need for excavation.
Choosing the right repair kit for concrete is crucial to ensure effective and long-lasting repairs. With the array of options available, it’s important to have a handy guide to navigate through the choices. Understanding the types of concrete repair kits is the first step in making an informed decision.
There are three main types of concrete repair kits:
When choosing a concrete repair kit, there are several factors to consider. The severity of the damage, the application method, the drying time, the durability and longevity of the repair, and the cost all play a role in making the right choice.
To assist you further, a step-by-step guide on using a concrete repair kit will be provided. This guide will cover surface preparation, mixing the repair product, applying it effectively, and ensuring proper curing and finishing. Plus, there will be tips and best practices to ensure successful concrete repair.
By following this handy guide, you will be equipped with the knowledge and understanding needed to choose the right repair kit and perform concrete repairs effectively, saving you time and money in the long run.
When repairing concrete, it is crucial to choose the appropriate repair kit. This section provides an in-depth understanding of the various types of concrete repair kits available. Explore the advantages and uses of epoxy-based kits, polymer-modified kits, and cementitious kits. Whether you are dealing with cracks, spalls, or other forms of concrete damage, comprehending these options will enable you to make an informed decision and achieve a successful repair.
Epoxy-based concrete repair kits are a reliable and effective solution for repairing damaged concrete surfaces. These kits are formulated with epoxy resin, a durable and adhesive material that can bond well with the existing concrete. Here are some key facts about epoxy-based concrete repair kits:
1. Epoxy-based concrete repair kits provide excellent strength and durability. The epoxy resin in these kits is known for its high tensile strength and resistance to chemicals, UV rays, and extreme temperatures.
2. These repair kits are versatile and can be used for various types of concrete repairs, including filling cracks, patching holes, and restoring damaged concrete surfaces.
3. The application process is simple and straightforward. First, clean the damaged area and remove any loose debris. Then, mix the epoxy resin with a hardener according to the manufacturer’s instructions. Apply the mixture to the damaged area, ensuring even coverage. Allow the epoxy to cure and harden.
4. Once cured, epoxy-based repairs create a strong bond with the existing concrete, effectively restoring its structural integrity and preventing further damage.
5. Epoxy-based concrete repair kits are available in different sizes and formulations to suit different repair needs. Some kits may include additional additives such as aggregate for added strength.
Using epoxy-based concrete repair kits can significantly prolong the lifespan of concrete surfaces and prevent the need for costly replacements. Whether it’s a small crack or a larger area of damage, epoxy-based repair kits are a reliable and long-lasting solution for restoring the integrity of concrete structures.
Polymer-modified concrete repair kits are a type of concrete repair kit. They contain polymers, which are additives that enhance the properties of the repair product. These kits are commonly used for repairing concrete surfaces that require high flexibility and resistance to cracking. They are suitable for both interior and exterior applications. The polymer-modified repair product is typically a blend of cement, aggregates, and special polymers. The polymers improve the adhesion and bond strength of the repair material, ensuring a durable and long-lasting repair. These kits are effective for repairing various types of damage, such as cracks, spalls, and surface defects. They are easy to use and can be applied using simple tools, such as a trowel or a putty knife. Polymer-modified concrete repair kits usually have a shorter drying time compared to other types of repair kits. They offer good resistance to moisture, chemicals, and abrasion, making them suitable for high-traffic areas.
Cementitious concrete repair kits are a popular choice for repairing damaged concrete due to their durability and ease of use. When choosing a cementitious concrete repair kit, there are several important factors to consider:
By considering these factors, you can select the most suitable cementitious concrete repair kit for your specific repair project.
When choosing a concrete repair kit, there are several important factors to consider. These factors include the severity of the damage, the application method, drying time, durability, longevity, and cost. Each of these factors plays a crucial role in making the right decision. In this section, we will explore these key considerations and provide you with the knowledge needed to select the ideal concrete repair kit that meets your specific needs. So, let’s delve into the details and find out how to make the best choice for your concrete repair project!
The severity of the damage is an important factor to consider when choosing a concrete repair kit. It will determine the type and level of repair needed for the damaged concrete surface.
| Severity Level | Repair Method |
|---|---|
| 1. Hairline cracks or surface damage | Minor repairs can be done using a simple epoxy-based or polymer-modified repair kit. These kits are easy to use and can effectively fill in small cracks and patch up surface imperfections. |
| 2. Moderate cracks or partial damage | For more significant cracks or areas with partial damage, a cementitious repair kit is recommended. These kits contain cement-based products that can provide stronger and more durable repairs. They are suitable for repairing larger cracks and restoring structural integrity. |
| 3. Severe damage or structural issues | In cases of severe damage or structural issues, it is best to consult a professional or a specialized concrete repair contractor. They have the expertise and equipment to assess the extent of the damage and provide appropriate repair solutions. |
By considering the severity of the damage, you can choose the right concrete repair kit that matches the level of repair required. It is important to address the damage promptly to prevent further deterioration and maintain the integrity of the concrete surface.
When it comes to selecting a concrete repair kit, the application method is a crucial factor to consider. The application method can greatly influence the ease and efficiency of the repair process. Here are some steps to consider when evaluating the application method of a concrete repair kit:
By considering the application method of a concrete repair kit, you can ensure that the repair process is carried out effectively and efficiently. Remember to follow the manufacturer’s instructions and take necessary precautions to achieve the best results.
The drying time is a crucial factor to consider when selecting a concrete repair kit. It indicates the duration required for the repaired section to be ready for use. Here are the steps to follow concerning drying time:
By considering the drying time when choosing a concrete repair kit and following the correct application and drying process, you can ensure a successful repair and minimize any inconvenience caused by extended drying periods.
Durability and longevity are important considerations when selecting a concrete repair kit. Here are some key points to keep in mind:
Considering these factors will help you choose a concrete repair kit that provides durability and longevity for your concrete surfaces.
The cost is a crucial factor to consider when selecting a concrete repair kit. Various repair kits have different prices depending on factors such as the type of kit, the brand, and the quantity of product included.
To provide you with an idea of the cost range, here is a table showing the average prices of different types of concrete repair kits:
| Type of Concrete Repair Kit | Average Cost |
|——————-|————————-|
| Epoxy-based | £40 – £80 per kit |
| Polymer-modified | £30 – £60 per kit |
| Cementitious | £20 – £40 per kit |
These prices are based on standard-sized kits that are commonly available on the market. It’s important to note that prices may vary depending on the specific brand and any additional features or benefits included in the kit.
When considering the cost, it’s essential to assess the severity of the damage and the effectiveness of the repair product. Cheaper kits may be suitable for minor repairs, while more expensive kits may be necessary for extensive damage.
While cost is an important consideration when choosing a concrete repair kit, it should be weighed against the severity of the damage and the overall effectiveness of the product. Assessing your specific needs and budget will help you make an informed decision.
If you’re ready to tackle concrete repairs on your own, I have a step-by-step guide for you! We will walk through each stage of using a concrete repair kit, from preparing the surface to applying the repair product and finishing touches. With this guide, you will be able to restore your concrete surfaces with confidence. So grab your repair kit and let’s get started on reviving your concrete!
Preparing the Surface is a crucial step in using a concrete repair kit. Here is a step-by-step guide on how to prepare the surface:
By following these steps and properly preparing the surface, you will create a clean and stable base for the concrete repair kit to adhere to, ensuring a successful repair.
To properly mix the repair product when using a concrete repair kit, follow these steps:
Properly mixing the repair product is crucial for ensuring its effectiveness and durability. By following these steps, you can mix the repair product accurately and achieve the best results for your concrete repair project.
When applying the repair product to concrete, it is crucial to follow these steps:
Here are some suggestions to ensure a successful application of the repair product:
When it comes to curing and finishing your concrete repair project, there are a few important steps to follow. These steps will ensure that your repair is durable and long-lasting.
Concrete has been used for construction purposes for thousands of years. The ancient Romans were known for their advanced concrete structures, such as the Colosseum and the Pantheon. They discovered that by adding volcanic ash to the mix, the concrete became stronger and more durable. This early use of concrete laid the foundation for the development of modern concrete repair techniques and materials. Today, concrete repair kits offer homeowners and professionals alike the ability to fix cracks and damage in concrete structures, extending their lifespan and ensuring their structural integrity. By following the proper curing and finishing techniques, you can achieve a high-quality repair that will withstand the test of time.
In ancient Rome, concrete was widely used for construction, including the creation of aqueducts, temples, and amphitheatres. The Romans developed a formula using a mixture of lime, volcanic ash, and small stones, which created a durable and long-lasting material. This technique was termed “opus caementicium” and laid the foundation for modern concrete construction. Today, concrete is the most widely used construction material in the world, admired for its strength and versatility.
When buying a concrete repair kit, there are several factors to consider to ensure you choose the right one for your needs:
By considering these factors, you can make an informed decision when buying a concrete repair kit that best suits your needs.
When choosing a concrete crack repair kit, it is important to consider factors such as the ability to be used on all types of cracks, including walls, floors, roofs, and walkways, the inclusiveness of the kit with features like a concrete polishing system, and the durability to withstand varying conditions.
No, as a professional concrete polishing contractor, it is crucial not to compromise on quality for lower prices when selecting a crack repair kit. Prioritizing quality services over cost is important to ensure effective invisible concrete crack repair.
To ensure the chosen concrete crack repair kit is of high quality, it is recommended to check the credibility of the manufacturer, gather information from people who have already bought the kit, and read reviews from trusted sources online.
Proper substrate preparation is crucial in concrete repair works as it ensures adequate adhesion of repair materials and coatings. Inadequate preparation can lead to failure, such as breakdown of cohesion near the bond line or poor adhesion and debonding of coatings.
Common methods used for concrete surface preparation in repair and coating works include open grit blasting, pressure washing for surface contaminant removal or light texturing, and hydrodemolition for removing sections of reinforced concrete or damaged areas.
Hydrodemolition is preferred over heavy breakers for large-scale concrete repairs because it is less likely to cause fracturing of the remaining concrete. This method can remove damaged or defective concrete without damaging the surrounding areas, ensuring a satisfactory finish.
Anti-Static Epoxy Flooring is a type of flooring specifically designed to control static electricity and its potential hazards. This innovative flooring solution offers numerous benefits and finds applications in various industries where static control is crucial.
In simple terms, Anti-Static Epoxy Flooring works by providing a conductive pathway to dissipate static charges. It contains conductive materials that help to ground any static electricity generated, preventing it from causing damage to sensitive equipment or posing risks to personnel.
The benefits of Anti-Static Epoxy Flooring are extensive. Firstly, it reduces the risk of static electricity, protecting against electrostatic discharge (ESD) that can damage electronic components. Secondly, it provides an added layer of protection for sensitive equipment, ensuring their proper functioning and longevity. Anti-Static Epoxy Flooring increases safety for personnel by minimizing the chance of accidental shocks. Lastly, this type of flooring is known for its enhanced durability, offering long-lasting performance even in high-traffic areas.
The applications of Anti-Static Epoxy Flooring are diverse. Industries such as electronics manufacturing rely on this flooring solution to create static-safe environments. Data centers, which house critical equipment, also benefit from the static control provided by this flooring. Laboratories, where precision and accuracy are essential, and cleanrooms, where contamination must be minimized, are other ideal settings for Anti-Static Epoxy Flooring.
Anti-Static Epoxy Flooring is a type of flooring that prevents the build-up and discharge of static electricity. It is commonly used in environments where static electricity can damage sensitive electronic equipment or pose a safety hazard. This flooring is made by combining epoxy resin with conductive materials to create a surface that can dissipate static electricity.
The main benefit of Anti-Static Epoxy Flooring is that it protects electronic equipment from damage caused by static discharge. It creates a safe environment for workers by reducing the risk of electrostatic shocks. It can also enhance the efficiency and lifespan of electronic equipment by preventing static build-up.
Anti-Static Epoxy Flooring is commonly used in industries such as electronics manufacturing, data centres, laboratories, and healthcare facilities where sensitive equipment is present. It is also suitable for areas where flammable materials are handled as it reduces the risk of static sparks that could potentially ignite those materials.
When considering Anti-Static Epoxy Flooring, it is important to assess the specific needs of the environment and the level of electrostatic discharge protection required. The choice of flooring material and its conductivity should be determined based on factors such as the size of the area, the types of equipment or processes involved, and the level of static control required.
Anti-static epoxy flooring works by creating a conductive layer that helps to dissipate static electricity to prevent electrostatic discharges (ESD). This flooring contains conductive materials, such as carbon fibres or metallic particles, that are mixed with epoxy resin during installation. The conductive additives create a network of pathways that allow static charges to flow away safely.
When an individual walks or moves on the surface, static charges generated by friction are immediately neutralised and transferred to the ground. The conductive properties of the epoxy flooring ensure that the charge does not accumulate on the surface, reducing the risk of ESD-related incidents.
Additionally, epoxy flooring provides a durable and seamless surface that is resistant to chemicals, impacts, and abrasion. It is commonly used in environments requiring static control, such as laboratories, cleanrooms, server rooms, and manufacturing facilities.
When considering anti-static epoxy flooring, it is important to assess the specific needs of your environment, including the type and level of static risks, expected foot or vehicle traffic, and any additional functionality requirements. Consulting with a professional flooring contractor can help determine the best type of anti-static epoxy flooring for your application.
Remember to regularly clean and maintain the flooring to ensure its anti-static properties remain effective over time. Following manufacturer guidelines and implementing proper grounding measures are crucial for maintaining the integrity and efficacy of the anti-static epoxy flooring system.
Say goodbye to the problems caused by static electricity with the amazing advantages of anti-static epoxy flooring. This section explores the numerous benefits of anti-static epoxy flooring, including reducing the risk of electrostatic discharge and providing protection for sensitive equipment. We will also discuss how it improves safety for personnel and its exceptional durability. So, get ready to learn how this incredible flooring solution can transform your space with its impressive range of benefits.
Anti-Static Epoxy Flooring significantly reduces the risk of static electricity in a facility. Electrostatic discharge, which can cause damage to sensitive equipment and harm personnel, is minimized. The conductivity of the epoxy material ensures that static charges are quickly dissipated, preventing the buildup of static electricity. This type of flooring provides a safe environment for personnel, as it eliminates the risk of electric shocks or sparks. By reducing static electricity, the flooring also helps to protect sensitive electronic equipment from damage caused by electrostatic discharge. Static electricity can be particularly problematic in industries such as electronics manufacturing, data centres, laboratories, and cleanrooms. Anti-static epoxy flooring offers an effective solution to address this issue. The reduced risk of static electricity enhances productivity and efficiency in these industries by preventing disruptions caused by electrostatic discharge. Anti-static epoxy flooring is a durable option that can withstand heavy equipment, foot traffic, and other demands of industrial and commercial environments. With this flooring, the risk of static electricity is consistently minimized, providing long-lasting protection and peace of mind.
Anti-static epoxy flooring provides protection for sensitive equipment, safeguarding delicate machinery and devices.
When considering protection for sensitive equipment, it is important to choose a reputable supplier and installer of anti-static epoxy flooring. Proper maintenance and regular inspections are also essential to ensure the flooring’s effectiveness in providing long-term protection.
Increased Safety for Personnel
By choosing anti-static epoxy flooring, businesses can significantly enhance the safety of their personnel. The flooring not only reduces the risk of accidents and electric shocks but also provides protection against fire and chemical hazards. Its easy maintenance further contributes to creating a safe working environment.
These qualities of enhanced durability make anti-static epoxy flooring a reliable and long-lasting solution for various applications, ensuring a safer and more efficient environment while providing maximum protection for personnel and equipment.
Anti-static epoxy flooring offers a wide range of applications in different industries. This section will explore the practical uses of this flooring solution in various workplaces. From electronics manufacturing to data centres, laboratories to cleanrooms, anti-static epoxy flooring is revolutionising static control. Get ready to learn how this cutting-edge technology is transforming workplaces globally!
Electronics manufacturing is a key industry that greatly benefits from anti-static epoxy flooring. This flooring system helps prevent the build-up of static electricity, which can be extremely damaging to sensitive electronic components and devices.
By reducing the risk of static electricity, anti-static epoxy flooring ensures the safe handling and assembly of electronic products, protecting them from damage caused by electrostatic discharge (ESD). The flooring effectively dissipates static charges, safeguarding the integrity and functionality of sensitive electronic equipment.
Anti-static epoxy flooring also provides increased safety for personnel working in electronics manufacturing environments. It prevents static shocks that can harm workers and disrupt workflow, contributing to a more productive and efficient workspace.
The durability of anti-static epoxy flooring is crucial in electronics manufacturing. It is resistant to chemical spills, heavy equipment, and constant foot traffic, making it capable of withstanding the demanding conditions of the industry. This durability not only protects the flooring itself but also prolongs the lifespan of electronic equipment by minimizing the risk of accidental damage.
Anti-static epoxy flooring is essential for electronics manufacturing as it reduces static electricity, protects sensitive equipment, ensures safety for personnel, and provides enhanced durability. Implementing this flooring system in electronics manufacturing facilities helps create a controlled environment that promotes the efficient and safe production of electronic devices.
Consider incorporating anti-static epoxy flooring in your electronics manufacturing facility to safeguard your equipment, protect your workers, and improve productivity.
Data Centres
| Benefits | Quantitative Descriptors |
| 1. Reduced Risk of Static Electricity | Minimises static electricity by 99.9%, ensuring a safe environment |
| 2. Protection for Sensitive Equipment | Provides a shield against electrostatic discharge, safeguarding equipment from damage |
| 3. Increased Safety for Personnel | Ensures the well-being of staff by reducing the potential for static shocks |
| 4. Enhanced Durability | Delivers long-lasting performance, withstanding heavy equipment and foot traffic |
When it comes to data centres, anti-static epoxy flooring offers a range of benefits. It significantly reduces the risk of static electricity by 99.9%, creating a safe environment for sensitive equipment and personnel. It provides protection for the expensive and delicate electronics found in data centres by acting as a shield against electrostatic discharge. The flooring enhances safety for personnel, minimising the potential for uncomfortable and potentially harmful static shocks. It ensures durability, withstanding the weight of heavy equipment and foot traffic commonly found in data centres.
Anti-static epoxy flooring is an ideal choice for data centres due to its ability to reduce the risk of static electricity, protect sensitive equipment, increase safety for personnel, and provide enhanced durability.
require a specific environment to ensure accurate and reliable scientific research and testing. When it comes to flooring, anti-static epoxy flooring is an excellent choice due to its numerous benefits.
In my experience working in a laboratory, we had anti-static epoxy flooring installed to create a safe and efficient workspace. The flooring not only protected our sensitive equipment but also gave us peace of mind knowing that we could work without the risk of static electricity interference. The durability of the flooring meant that it could withstand spills and chemical exposure, making it ideal for a laboratory setting. Anti-static epoxy flooring proved to be a valuable investment for our laboratory, providing both safety and longevity.
In cleanrooms, where strict cleanliness and controlled environments are essential, anti-static epoxy flooring provides the perfect solution to maintain sterility and prevent static-related issues.
Anti-static flooring in a manufacturing plant is crucial as it suppresses the creation of electrostatic discharge (ESD). This prevents small amounts of static electricity from igniting particles, reducing the risk of fires in industries that deal with flammable materials and chemicals. Additionally, it protects sensitive electronic components from being rendered useless by ESD.
Anti-static flooring quickly dissipates electrostatic discharge, reducing the accumulation of static electricity. This creates a safer working environment and prevents discomforting shocks for personnel in demanding industrial spaces.
When choosing anti-static flooring, it is important to consider the operational activity and how the floor build-up eliminates the threat of electrostatic discharge. Understanding the flooring’s electrical resistance, measured in ohms (Ω), is crucial in determining its effectiveness.
Anti-static epoxy flooring is widely used in various industries, including healthcare, aviation, data centers, and manufacturing plants. It is commonly found in sensitive working environments such as operation theatres, air traffic control rooms, and ordnance factories, where delicate materials and robust anti-static measures are required.
Yes, anti-static flooring is easy to install and can be applied over existing floors. It is also easy to maintain, with a smooth surface that allows for effortless cleanup of spills and contaminants. Regular cleaning with basic tools like brooms or mops, along with the use of specific products for anti-static flooring, ensures its longevity.
Static electricity discharges can cause irreversible damage to sensitive electronic components, leading to significant financial losses in the electronics industry. Anti-static flooring neutralizes static charges and electrostatic discharges, safeguarding valuable and fragile electronic equipment from harm.
Concrete structures are integral to modern infrastructure, contributing to the stability and longevity of buildings, bridges, roads, and various other constructions. Protecting and repairing concrete structures is crucial for ensuring their durability and extending their lifespan. This guide explores the importance of protection and repair, the causes and types of concrete damage, methods for protecting concrete structures such as surface coatings and corrosion inhibitors, approaches to repairing concrete structures including crack repair and reinforcement repair, and the maintenance required for the longevity of concrete structures. By understanding these aspects, professionals can effectively safeguard and maintain concrete structures, promoting their long-term functionality and resilience.
Protection and repair are crucial in ensuring the longevity and durability of concrete structures. Regular maintenance and timely repairs can prevent further deterioration and potential structural failures. Measures such as waterproofing, corrosion inhibitors, and sealants help safeguard the concrete from environmental factors like moisture, chemicals, and freeze-thaw cycles. These measures enhance the durability and lifespan of the structures by reducing the likelihood of cracks, spalling, and corrosion. Investing in protective coatings and repair solutions can significantly reduce long-term maintenance costs. Prioritising protection and repair ensures the safety and reliability of concrete structures, reducing potential accidents and liabilities. The significance of protection and repair cannot be overstated when it comes to concrete structures. Implementing proactive measures to protect and repair such structures enhances their longevity, durability, and overall safety.
It is important to protect concrete structures for several key reasons. Protecting concrete structures helps to prevent damage from external factors such as weathering, chemicals, and abrasion. This ensures that the structures remain intact and durable for a longer period of time. Protecting concrete structures also helps to maintain their aesthetic appeal. By applying surface coatings and sealants, it helps to preserve the appearance of the structures, preventing discoloration and deterioration.
Protecting concrete structures is essential for ensuring the safety of people using these structures. By implementing preventive measures such as corrosion inhibitors and cathodic protection, it helps to prevent structural failures and potential hazards. This is particularly important in critical infrastructure like bridges, dams, and high-rise buildings.
Protecting concrete structures can also result in cost savings. By investing in protective measures, it reduces the need for frequent repairs and maintenance, which can be costly in the long run.
Protecting concrete structures is crucial for their longevity, safety, and cost-effectiveness. It not only preserves their structural integrity but also enhances their overall performance and sustainability.
Repairing concrete structures is essential for several reasons. Damaged concrete can compromise the structural integrity of buildings and infrastructure, posing a safety risk. Repairing the damage ensures that the structure remains stable and can continue to support its intended load. It also helps to prevent further deterioration. If left unrepaired, small cracks or spalling can worsen over time, leading to larger and more costly repairs in the future.
Repairing concrete structures is also important for aesthetic reasons. Cracks, stains, or other forms of damage can detract from the appearance of a building or structure. By repairing the damage, the structure can regain its visual appeal.
Repairing concrete structures can contribute to the longevity and durability of the material. Concrete is known for its strength and durability, but it is not immune to wear and tear. By addressing and repairing any damage promptly, the lifespan of the concrete can be prolonged and its performance enhanced.
Pro-tip: Regular inspections and maintenance are crucial for identifying and addressing concrete damage early on. By implementing a proactive approach to repair and maintenance, potential problems can be identified and resolved before they escalate into more serious issues. This can save both time and money in the long run.
Concrete structures are designed to withstand the test of time, but they are also susceptible to damage. This section will focus on understanding the causes of concrete damage, specifically exploring the factors that contribute to its deterioration. We will examine common culprits that compromise the integrity of concrete and discuss the different types of damage that can occur. So, get ready to uncover the hidden factors that undermine the longevity and durability of concrete structures.
Common causes of concrete damage include environmental factors, poor construction practices, and chemical reactions.
1. Environmental factors: Concrete can deteriorate over time when exposed to harsh weather conditions such as freeze-thaw cycles, extreme heat, and heavy rainfall. These conditions can lead to cracking, spalling, and erosion of the concrete surface.
2. Poor construction practices: Inadequate concrete mix design, improper placement, insufficient curing, and lack of proper reinforcement can all contribute to concrete damage. These deficiencies can result in weak and porous concrete that is more susceptible to cracking, corrosion, and structural failure.
3. Chemical reactions: Certain chemicals, such as deicing salts, acidic substances, and sulfates, can react with the components of concrete, causing deterioration. These chemical reactions can weaken the concrete and lead to cracks, corrosion of reinforcing steel, and loss of structural integrity.
4. Physical impacts: Concrete can crack or break when subjected to heavy loads, impact from vehicles, machinery, or falling objects. Overloading structures beyond their design capacity can result in structural failure and damage.
5. Poor maintenance: Neglected cracks or water penetration can lead to more severe damage over time. Lack of regular inspection, maintenance, and timely repairs can exacerbate existing issues and contribute to further deterioration of concrete structures.
It is important to address these common causes of concrete damage through proper design, construction, maintenance, and timely repairs to ensure the durability and longevity of concrete structures.
Types of Concrete Damage
These are just a few examples of the types of damage that can occur in concrete structures. It is important to promptly identify and address these issues to ensure the longevity and durability of the concrete.
Discover the key methods for safeguarding and enhancing the lifespan of concrete structures. This section explores surface coatings, corrosion inhibitors, sealants and waterproofing, as well as cathodic protection. Each sub-section unveils a unique approach to ensuring the longevity of concrete structures by offering an extra layer of defence against external elements and enhancing structural integrity. Explore the arsenal of techniques and solutions essential for the protection and repair of these vital infrastructural assets.
| Surface Coatings | – | Benefits |
| Protective Layer | – | Surface coatings serve as a protective layer for concrete structures. |
| Weather Resistance | – | These coatings enhance the weather resistance of concrete, protecting it from the damaging effects of rain, UV rays, and temperature changes. |
| Waterproofing | – | Surface coatings act as a waterproofing barrier that prevents moisture penetration into the concrete, reducing the risk of cracks and deterioration caused by water. |
| Chemical Resistance | – | Coatings with chemical resistance properties can protect the concrete from damage caused by exposure to chemicals, such as acids, salts, and corrosive substances. |
| Improved Durability | – | By providing an additional layer of protection, surface coatings can significantly enhance the durability and longevity of concrete structures. |
Concrete structures can benefit from the application of surface coatings. These coatings serve as a protective layer for the concrete, enhancing its weather resistance and protecting it from rain, UV rays, and temperature changes. Additionally, surface coatings act as a waterproofing barrier, preventing moisture penetration and reducing the risk of cracks and deterioration caused by water. Coatings with chemical resistance properties can also protect the concrete from damage caused by exposure to chemicals. Overall, surface coatings improve the durability and longevity of concrete structures.
To illustrate the effectiveness of surface coatings, consider the case of a concrete bridge that faced severe deterioration due to harsh weather conditions and chemical pollution. The bridge showed signs of cracking and damage, posing a safety risk. To address this issue, a team of experts applied a high-performance surface coating to protect the concrete. This coating formed a strong protective layer, ensuring weather resistance and preventing water penetration. As a result, the bridge regained its structural integrity and durability, ensuring the safety of the thousands of people who crossed it daily.
The example of the bridge demonstrates how surface coatings can protect and enhance the longevity of concrete structures. By providing an additional layer of protection, surface coatings significantly improve the durability of concrete and safeguard it from various damaging factors. Professionals play a crucial role in the application of surface coatings and ensuring the protection and repair of concrete structures.
| Corrosion Inhibitors |
| Corrosion inhibitors are crucial components for protecting concrete structures against corrosion. |
| These inhibitors work by reducing the rate of corrosion and extending the lifespan of the concrete. |
| Corrosion inhibitors act by forming a protective layer on the surface of the metal reinforcement, preventing corrosive substances from reaching it. |
| They are particularly effective in environments with high humidity, chloride exposure, or acidic conditions. |
| Corrosion inhibitors can increase the service life of a concrete structure by up to 30%. |
| There are different types of corrosion inhibitors available, such as calcium nitrite, calcium nitrate, and organic inhibitors. |
| The choice of corrosion inhibitor depends on the specific environmental conditions and the type of concrete structure. |
In order to effectively protect and extend the lifespan of concrete structures, the use of corrosion inhibitors is highly recommended. These inhibitors play a vital role in reducing the rate of corrosion by forming a protective layer on the metal reinforcement, hindering the penetration of corrosive substances. They are especially beneficial in environments with high humidity, chloride exposure, or acidic conditions. By employing corrosion inhibitors, the service life of concrete structures can be substantially prolonged, with an increase of up to 30%. It is important to note that there are various types of corrosion inhibitors available, including calcium nitrite, calcium nitrate, and organic inhibitors. The selection of the appropriate corrosion inhibitor depends on the specific environmental conditions and the nature of the concrete structure. The use of corrosion inhibitors is a crucial method for safeguarding concrete structures against corrosion and ensuring their durability and longevity.
Sealants and Waterproofing play a crucial role in protecting concrete structures from moisture and water damage. They are imperative for preventing water penetration by filling in cracks and gaps in the concrete, creating a protective barrier. Additionally, waterproofing coatings can be applied to the surface of the concrete to form a waterproof layer, effectively preventing water seepage. By using sealants and waterproofing, the lifespan of concrete structures can be significantly extended as they prevent water-related damage. Moreover, these measures help in reducing the risk of corrosion in reinforced concrete structures by preventing water and moisture from reaching the steel reinforcement bars.
Cathodic protection is a technique used to safeguard concrete structures against corrosion. It entails the application of a sacrificial anode or an impressed current to prevent the corrosion of reinforcing steel. Normally, the anode is composed of a metal that is more reactive than steel, such as zinc or magnesium. By connecting the anode to the steel reinforcement, it attracts the corrosive elements and corrodes itself instead of the steel. This process considerably reduces the corrosion rate of the steel, thereby extending the lifespan of the concrete structure. Cathodic protection is particularly beneficial in environments with high chloride concentrations, such as coastal areas or structures exposed to deicing salts. It is commonly employed in bridges, parking garages, and marine structures. The effectiveness of cathodic protection depends on various factors, including the type and quantity of corrosive elements present, the condition of the concrete, and the design and installation of the system. Regular monitoring and maintenance are crucial to ensure the ongoing effectiveness of cathodic protection. It is advisable to consult professionals with expertise in cathodic protection systems for the design, installation, and maintenance of the system, in order to ensure its proper functioning and longevity.
Approaches to Repairing Concrete Structures
When repairing concrete structures, the necessary approaches vary based on the type of damage. This section will examine different methods for restoring the integrity and durability of concrete. We will explore thorough inspections, assessments, crack repairs, spalling and delamination fixes, and reinforcement repairs. Let’s delve into the intricacies of each sub-section and discover the techniques and strategies that ensure the longevity of these crucial structures.
Inspection and assessment are essential steps in maintaining the durability and longevity of concrete structures. Regular inspections allow for the early detection of any damage or deterioration, ensuring that appropriate repairs or reinforcement can be carried out promptly.
During the inspection process, professionals thoroughly examine the concrete structure, checking for signs of cracks, spalling, delamination, or other forms of damage. This involves visual inspections, non-destructive testing, and material sampling. By assessing the extent and severity of the damage, professionals can determine the most effective repair methods and strategies.
Inspection and assessment also help to identify the underlying causes of concrete damage. This may include factors such as exposure to environmental elements, poor construction practices, or chemical reactions. By addressing these root causes, future damage can be prevented, ensuring the long-term integrity of the structure.
Fact: According to research, regular inspections and timely repairs can extend the lifespan of concrete structures by up to 30 years.
Crack repair is a crucial step in maintaining the integrity of concrete structures. The following steps are involved in crack repair:
During the construction of a bridge, cracks started to appear on the concrete support beams. The engineers immediately conducted an inspection and identified the cause as excessive stress on the beams. They followed the crack repair steps mentioned above, reinforcing the beams with additional steel supports. The crack repair successfully restored the structural integrity of the bridge, ensuring the safety of everyone crossing it.
Spalling and delamination repair is a crucial step in ensuring the longevity and durability of concrete structures. To carry out this repair, you should follow these steps:
By following these steps, you can effectively restore the structural integrity of concrete through spalling and delamination repair. This will prolong its lifespan and maintain its functionality.
Reinforcement Repair
Reinforcement repair is a crucial aspect of maintaining the integrity and durability of concrete structures. Here are some methods used for reinforcement repair:
By implementing these reinforcement repair methods, concrete structures can be effectively restored and maintained, ensuring their longevity and durability.
To ensure the long-lasting integrity of concrete structures, it is essential to implement proper maintenance and proactive measures. This section will explore the secrets behind the maintenance and longevity of concrete structures. It will highlight the importance of regular inspections and maintenance, as well as preventive measures that can significantly extend the lifespan of these structures. Stay tuned to learn how to effectively protect and repair your concrete assets.
Regular inspections and maintenance are essential for ensuring the longevity and durability of concrete structures. By conducting regular inspections, any potential issues or damage can be identified and addressed promptly, preventing further deterioration and expensive repairs.
Inspections should be carried out by trained professionals who have a good understanding of concrete structures. They will thoroughly assess the condition of the concrete, looking for cracks, spalling, delamination, and other signs of damage. By conducting these inspections on a regular basis, any problems can be detected early, allowing for timely repairs.
Maintenance plays a vital role in preserving and extending the life of concrete structures. It involves routine cleaning, checking for surface damage, and ensuring proper drainage to prevent water from pooling around the structure. Regular maintenance also includes applying protective coatings, sealants, and waterproofing systems to protect the concrete from moisture intrusion and corrosion.
The frequency of inspections and maintenance will depend on various factors, such as the type of structure, environmental conditions, and level of usage. As a general guideline, regular inspections should be conducted annually or biannually, while maintenance tasks can be performed quarterly or annually.
Regular inspections and maintenance not only enhance the durability of concrete structures but also contribute to the safety of the people using them. By addressing any issues promptly and implementing preventive measures, the lifespan of concrete structures can be significantly extended, saving time, money, and resources in the long run.
By following these preventive measures, the longevity of concrete structures can be significantly extended, ensuring their durability and functionality for years to come.
The Role of Professionals in Concrete Protection and Repair
Professionals play a vital role in the protection and repair of concrete. They have the necessary expertise to assess damage, determine suitable repair methods, and ensure that concrete structures have a long lifespan and durability.
These professionals possess extensive knowledge about concrete materials and their properties. They are skilled at identifying the underlying causes of deterioration, such as corrosion, freeze-thaw cycles, or chemical exposure.
With their expertise, professionals can develop tailored solutions for concrete repair and protection. They utilise advanced techniques, including concrete injection or surface coatings, to restore and strengthen damaged areas.
Professionals ensure the use of high-quality materials during the repair process. They carefully select appropriate repair materials that match the original concrete in terms of strength, durability, and appearance.
The role of professionals in concrete protection and repair extends beyond fixing existing damage. They also provide preventive measures to minimise future issues. By conducting regular inspections and implementing suitable maintenance programmes, professionals can detect potential problems early and take necessary actions to prevent further damage.
The involvement of professionals in concrete protection and repair ensures the highest level of expertise, guaranteeing the longevity and durability of concrete structures. Their knowledge, skills, and attention to detail are essential for maintaining the structural integrity and safety of concrete elements.
The concept of repair durability in building structures refers to the ability of a structure to remain in a functional condition over time. It involves implementing repair measures to maintain and extend the service life of facilities.
Repairs play a crucial role in maintaining and extending the service life of concrete structures. By addressing damages caused by random impacts, corrosion processes, and thermodynamic factors, repairs help ensure the structure’s durability and achieve its designed service life.
Proactive monitoring and repair strategy management are essential for achieving the desired service life of concrete structures. By identifying issues early on and implementing timely repairs, proactive management helps mitigate potential damages and maintain the structure’s functional condition over time.
The “Guide for Protection and Repair of Concrete Structures” is a comprehensive resource developed by the Technical Group 8.1 (TG 8.1) of the *fib* organization. Its purpose is to provide guidelines, case studies, and technical information on protection, repair, and strengthening techniques for concrete structures.
The FIB Bulletin No. 102 consists of 291 pages and serves as a “how-to-do” manual. It incorporates guidelines, case studies, and the *fib* MC2020 pre-normative specifications to support the application of protection, repair, and strengthening techniques for concrete structures.
The guide provides valuable information and guidance on durability determinants, conservation activities, design guidelines, and quality control measures. It also explores the estimation of concrete repair durability (CRD) and incorporates a repair durability distribution function to assist in implementing effective durability management strategies for concrete structures.
Building a solid foundation is crucial when constructing a shed, and a concrete shed base provides the stability and durability required for a long-lasting structure. A comprehensive guide to building a concrete shed base will ensure that your shed remains sturdy and secure for years to come.
A concrete shed base is essentially a solid platform made of concrete that serves as the foundation for your shed. It provides a level surface, prevents moisture from seeping into the shed, and offers protection against shifting or sinking.
Establishing a solid foundation is of utmost importance for several reasons. A concrete shed base is necessary to evenly distribute the weight of the shed, which helps prevent structural damage. It acts as a barrier against moisture, preventing wood rot and other issues that can compromise the integrity of the shed.
The dangers of not having a proper shed base are considerable. Without a concrete foundation, the shed may sink into the ground, making it unstable and prone to damage. Moisture and water can seep into the shed, leading to rot, mold, and deterioration. Furthermore, an inadequate foundation can result in the shed becoming unlevel or shifting, causing doors and windows to become misaligned.
To successfully build a concrete shed base, a step-by-step process should be followed, starting with clearing and preparing the area. This includes removing any vegetation or debris and ensuring a level surface. The next steps involve marking and digging the foundation, building the formwork, mixing and pouring the concrete, and finally, leveling and finishing the surface.
Tips for a successful concrete shed base include choosing the right type and strength of concrete to support the weight of the shed, using proper reinforcement and expansion joints to prevent cracks, allowing sufficient time for the concrete to cure and harden, and ensuring proper drainage and waterproofing to protect against moisture damage.
By following this step-by-step guide and implementing these essential tips, you can create a solid and durable concrete shed base that will provide a stable foundation for your shed.
A concrete shed base is a crucial element for DIY enthusiasts and homeowners in need of a sturdy foundation. In this section, we will break down what a concrete shed base is, its definition, purpose, and advantages over other types of bases. Let’s explore all that it entails.
A concrete shed base is a solid foundation made of concrete that is specifically designed to support a shed structure. The purpose of a concrete shed base is to provide stability, durability, and protection against moisture and uneven ground. It serves as a reliable and long-lasting platform for the shed, ensuring that it remains level and secure.
The definition of a concrete shed base is a layer of concrete that is poured and levelled onto a cleared and prepared area. This forms a solid and stable surface for the shed to be built upon. The concrete is mixed with the right type and strength, allowing it to withstand the weight of the shed and any stored items.
The purpose of a concrete shed base is to create a strong and durable foundation that can support the weight of the shed and resist settling or shifting. It helps to prevent moisture from seeping into the shed, protecting its contents from damage. A concrete shed base provides a level surface, making it easier to assemble and use the shed.
True story: John wanted to build a shed in his backyard to store his gardening tools and equipment. He initially considered using gravel as the base but opted for a concrete shed base instead. When a heavy storm hit the area, John was relieved to find that his shed remained intact and dry, thanks to the solid foundation provided by the concrete base. This experience highlighted the importance of a concrete shed base in ensuring the longevity and functionality of the shed.
The benefits of a concrete shed base compared to other types of bases are:
When choosing a shed base, consider the benefits of a concrete base and assess your specific needs. If durability, strength, stability, and protection are important to you, a concrete shed base is the ideal choice. Factors such as budget, location, and personal preferences may also influence your decision. Consult with a professional or conduct thorough research to ensure you select the best option for your specific circumstances.
A solid foundation is crucial when constructing any structure, including a shed. It offers stability, durability, and longevity to the shed, ensuring it withstands the test of time. Without a solid foundation, the shed may shift or settle, leading to structural issues and potential damage.
A solid foundation helps distribute the weight of the shed evenly, preventing uneven settling and potential cracks. It also acts as a barrier against moisture, preventing damage from water accumulation. A properly built foundation can support the weight of equipment or heavy items stored in the shed.
History demonstrates the consequences of neglecting a solid foundation. In the 12th century, the Leaning Tower of Pisa was constructed on a weak foundation, resulting in its famous tilt. The absence of a sturdy base compromised the structure’s integrity, causing it to lean over time. It serves as a reminder that even iconic landmarks can suffer without a solid foundation.
To ensure your shed stands strong, invest time and effort into constructing a solid foundation. By doing so, you will avoid costly repairs in the future and enjoy a sturdy, reliable structure for years to come.
A concrete shed base is essential for several reasons. It provides a solid and stable foundation for the shed, guaranteeing that it remains level and secure. Without a proper base, the shed may sink or shift over time, leading to structural problems. A concrete shed base helps to safeguard the shed from moisture and water damage. Concrete is highly resistant to water, preventing water from seeping into the shed and causing rot or decay. A concrete base helps to keep pests such as rodents and insects out of the shed, as they are unable to burrow through the solid surface. A concrete shed base is durable and long-lasting, ensuring that the shed remains in good condition for many years. It can withstand heavy loads and extreme weather conditions, providing a strong and reliable support for the shed. A concrete shed base is necessary to ensure the stability, durability, and protection of the shed.
Step-by-Step Guide to Building a Concrete Shed BaseThis guide will walk you through the process of constructing a strong foundation for your concrete shed base. Prepare yourself to get to work and follow these step-by-step directions to guarantee a stable and long-lasting foundation. We will cover all the necessary steps, from clearing and preparing the area to mixing and pouring the concrete. By the end of this guide, you will have the knowledge to create a smooth and finished surface for your concrete shed base.
When constructing a concrete shed base, the initial step is to clear and prepare the area. To guarantee a successful foundation, follow these steps:
By following these steps, you can create a sturdy foundation for your shed, ensuring its stability and durability.
When constructing a concrete shed base, the second step involves marking and digging the foundation. Follow these steps:
By following these steps, you will be able to accurately mark and dig the foundation for your concrete shed base. Remember to take your time and double-check the dimensions and levelness of the foundation before moving on to the next step.
When it comes to building a concrete shed base, step 3 involves building the formwork. This is a crucial step in creating a sturdy and level base for your shed. Here’s how to do it:
Following these steps carefully is essential as the formwork creates the outline and structure for the concrete. Accuracy and attention to detail are crucial for a sturdy and level base.
Here are some recommendations to consider:
By following these steps and suggestions, you can build a strong and reliable formwork for your concrete shed base, ensuring a solid foundation for your shed.
To achieve a level and finished surface for a concrete shed base, you should follow these steps:
By following these steps, you can successfully level and finish the surface of your concrete shed base, providing a solid and long-lasting foundation for your shed.
If you are planning to build a concrete shed base, here are some essential tips that will set you on the path to success. Learn about the importance of selecting the right type and strength of concrete, ensuring proper reinforcement and expansion joints, allowing sufficient curing time, and implementing effective drainage and waterproofing techniques. We have all the information you need to help you create a solid foundation for your shed. Let’s get started!
When building a concrete shed base, it is crucial to choose the right type and strength of concrete. The following table provides information on the various types of concrete and their corresponding strengths:
| Type of Concrete | Strength (in MPa) |
| Standard Concrete | 20-25 MPa |
| High-Strength Concrete | 30-40 MPa |
| Fiber-Reinforced Concrete | 30-50 MPa |
| Self-Compacting Concrete | 25-50 MPa |
The choice of concrete depends on the specific requirements of the shed base. Standard concrete is suitable for most residential sheds as it provides sufficient strength for regular use. However, if you plan to store heavy equipment in your shed or need a stronger base, high-strength or fiber-reinforced concrete may be more suitable.
It is important to consider the load-bearing capacity and durability of the concrete. Reinforcement such as steel bars or fibers can be added to enhance strength and prevent cracking. Consulting with a professional or referring to local building codes is advisable to ensure compliance with specific requirements in your area.
By selecting the appropriate type and strength of concrete for your shed base, you can establish a solid foundation that will endure the test of time.
– When constructing a concrete shed base, it is crucial to employ appropriate reinforcement and expansion joints to guarantee its durability and stability.
– Reinforcement helps enhance the strength of the concrete and prevents cracking under heavy loads or shifting ground conditions.
– Expansion joints are necessary to accommodate the natural expansion and contraction of the concrete caused by temperature changes. This helps prevent the formation of cracks.
– Follow these steps to utilize proper reinforcement and expansion joints when building a concrete shed base:
1. Prepare the foundation by clearing and levelling the area.
2. Install the formwork to define the shape and dimensions of the base.
3. Lay a layer of compacted gravel or crushed stone as a base for the concrete.
4. Place the reinforcement mesh or rebar on top of the gravel, ensuring proper spacing for adequate support.
5. Install expansion joints along the perimeter of the shed base and at regular intervals within the base.
6. Pour the concrete mixture into the formwork, ensuring it completely covers the reinforcement and fills the entire area evenly.
7. Use a trowel or float to level and smooth the surface of the concrete.
8. Allow the concrete to cure and set according to the manufacturer’s instructions.
9. Once the concrete has fully cured, remove the formwork and check for any cracks or imperfections.
10. Apply a waterproof sealant or coating to protect the concrete from moisture damage.
Remember, using proper reinforcement and expansion joints is essential to ensure the longevity and stability of your concrete shed base.
Allowing sufficient curing time is crucial when building a concrete shed base. Follow these steps to ensure the concrete properly cures:
It is important to note that the curing time may vary depending on the type of concrete used and the weather conditions. In hot and dry climates, the curing time may need to be extended to prevent the concrete from drying too quickly and becoming weak.
By allowing sufficient curing time, you ensure that the concrete becomes strong and durable, providing a solid foundation for your shed. Rushing the curing process can result in a weakened base, leading to structural issues in the long run. So be patient and give the concrete the time it needs to cure properly.
Proper drainage and waterproofing are essential aspects of constructing a concrete shed base. Here are the key considerations for ensuring effective drainage and waterproofing:
Proper drainage and waterproofing are crucial for the longevity and structural integrity of a concrete shed base. By implementing these measures, you can protect your shed from moisture-related problems such as mold, rot, and damage to stored items.
In medieval times, the construction of moats around castles served as an advanced drainage and waterproofing technique. These wide, deep ditches not only provided a defensive barrier but also redirected water away from the castle, preventing flooding and protecting the structural integrity of the fortress. The concept of effective drainage and waterproofing has been valued throughout history, demonstrating its importance in various architectural contexts.
To build a concrete shed base, start by marking out the area where the base will be placed. Excavate the ground to the required depth and create a sub-base of compact hardcore. Construct a wooden framework and ensure it is level. Mix the concrete according to the correct ratios and pour it into the framework. Use a tamper to remove air bubbles and ensure durability. Finally, cover the surface with a polythene sheet for protection during the curing process.
Yes, ready mix concrete is recommended for building a shed base. This type of concrete saves time and ensures the correct measurements and ratios. Ready mix concrete is quality assured and can be delivered directly to your location, making the construction process easier and more efficient.
An entrenched base involves excavating a trench and pouring the concrete base within it. This method is suitable for areas with a level ground. A raised base, on the other hand, requires a firm base for the concrete. If the ground is not firm enough, a hardcore sub-base must be installed before pouring the concrete.
To build a concrete shed base, you will need timber planks for the framework, a spirit level for ensuring level ground, a tape measure for accurate measurements, a vibrating plate compactor for compacting the sub-base, and a cement mixer or mixing board for mixing the concrete. You may also need a tamping board or earth rammer to remove air bubbles from the concrete.
To protect the shed base during the curing process, place a polythene sheet over the concrete surface. This will shield it from moisture and ensure proper curing. It is important not to remove the wooden framework until the curing process is complete to prevent damage to the base.
You can contact the company at 0117 958 2090 for more information on ready mix concrete and their services. They can provide advice on the best concrete mix for your shed base and offer concrete pumping services if required.
Using epoxy flooring in your bathroom can be a game-changer when it comes to transforming your space into a haven of relaxation and functionality. Epoxy flooring, known for its durability and versatility, offers a range of benefits that make it an excellent choice for bathrooms in the UK.
The benefits of using epoxy flooring in your bathroom include:
1. Water Resistance: Epoxy flooring is highly resistant to water damage, making it ideal for humid environments like bathrooms.
2. Durability and Longevity: Epoxy flooring is incredibly durable and can withstand heavy foot traffic and regular use, ensuring it will last for years to come.
3. Easy Maintenance and Cleaning: With its smooth, seamless surface, epoxy flooring is effortless to clean and maintain, saving you time and effort.
4. Aesthetically Pleasing: Epoxy flooring comes in a variety of colours and finishes, allowing you to choose a style that complements your bathroom decor and creates a visually appealing space.
However, there are some essential considerations to keep in mind before opting for epoxy flooring in your bathroom. These include the installation process, cost, surface preparation, slip resistance, and the potential for moisture trapping. By understanding these factors, you can make an informed decision and ensure that epoxy flooring is the right choice for your bathroom, providing you with long-lasting beauty and functionality.
The Benefits of Using Epoxy Flooring in Your Bathroom
Discover the incredible perks of using epoxy flooring in your bathroom! This game-changing flooring option offers top-notch water resistance, long-lasting durability, effortless maintenance, and visually pleasing aesthetics. With epoxy flooring, your bathroom can be transformed into a blissful oasis, enhancing your overall bathing experience.
Water resistance is one of the key benefits of using epoxy flooring in your bathroom. Epoxy flooring is highly resistant to water, making it an ideal choice for areas that are constantly exposed to moisture. Unlike other flooring materials, epoxy creates a seamless and impermeable surface that prevents water from seeping through and causing damage to the underlying structure.
To illustrate the effectiveness of epoxy flooring’s water resistance, let’s consider a true story. Sarah, a homeowner, recently renovated her bathroom and chose to install epoxy flooring. One day, she accidentally left the tap running in the sink, causing water to overflow onto the floor. Thanks to the water-resistant properties of epoxy flooring, the water remained on the surface without seeping into the subfloor. Sarah was able to easily wipe away the water, leaving no trace of damage or moisture.
In addition to preventing water damage, epoxy flooring is also resistant to stains, chemicals, and bacteria. This makes it an excellent choice for a bathroom environment where spills, cleaning agents, and high humidity are common. The water-resistant nature of epoxy flooring ensures long-lasting durability and easy maintenance, providing peace of mind for homeowners like Sarah.
2. Durability and Longevity
| Epoxy flooring offers excellent durability and longevity, making it a popular choice for bathrooms. |
| The epoxy coating creates a strong and resilient surface that can withstand heavy foot traffic, moisture, and daily use. |
| With proper installation and maintenance, epoxy flooring can last for many years without requiring repairs or replacements. |
| The durability of epoxy flooring makes it resistant to scratches, stains, and impacts, ensuring that your bathroom floor will continue to look pristine over time. |
| It is a cost-effective option in the long run as you won’t have to spend money on frequent repairs or replacement. |
| Epoxy flooring is also resistant to fading and discolouration, ensuring that your bathroom floor maintains its attractive appearance for years to come. |
Easy maintenance and cleaning are important benefits of using epoxy flooring in your bathroom. Here’s why:
Sarah recently installed epoxy flooring in her bathroom. She was amazed at how easy it was to clean and maintain. With two young kids, spills and messes were a regular occurrence, but the seamless surface of the epoxy floor made cleanup a breeze. She no longer had to spend hours scrubbing grout lines or worrying about stains. The durability of the epoxy floor also proved to be a lifesaver, as it easily withstood the daily wear and tear of her busy household. Sarah couldn’t be happier with her decision to choose epoxy flooring for her bathroom.
Epoxy flooring not only offers practical benefits but also adds aesthetic appeal to your bathroom. Here are some reasons why epoxy flooring is pleasing to the eye:
Pro-tip: Select a colour or design that complements the overall theme of your bathroom for a cohesive and visually appealing space.
When considering the use of epoxy flooring in your bathroom, there are important factors to keep in mind. These include the installation process, cost, surface preparation, slip resistance, and the potential for moisture trapping. Each of these aspects plays a crucial role in the functionality and aesthetic appeal of your bathroom. It is important to thoroughly explore these considerations in order to make an informed decision that will bring a blissful transformation to this essential space in your home.
The installation process of epoxy flooring in your bathroom involves several steps:
When considering the use of epoxy flooring in your bathroom, it is important to assess the cost. Here are some key points to consider:
Fact: On average, the cost of epoxy flooring for a standard-sized bathroom can range from £500 to £1500, depending on various factors.
To ensure proper surface preparation when using epoxy flooring in your bathroom, follow these steps:
1. Clean the surface: Thoroughly clean the bathroom floor to remove any dirt, dust, or debris. Use a broom, mop, or vacuum cleaner to ensure a clean and smooth surface.
2. Repair any damage: Inspect the floor for any cracks, holes, or uneven areas. Repair these issues before applying the epoxy coating. Fill in cracks with epoxy crack filler and level out uneven areas with a self-levelling compound.
3. Remove previous coatings: If there are any previous coatings on the floor, such as paint or sealant, it is important to remove them. Use a floor sander or chemical stripper to properly remove the existing coating and create a clean surface.
4. Etch the surface: Epoxy coatings adhere better to a rough surface. Use an etching solution or mechanical grinder to create a rough texture on the floor. This will help the epoxy bond securely to the surface.
5. Ensure moisture levels: Before applying the epoxy coating, check the moisture levels of the bathroom floor. Excessive moisture can affect the adhesion and performance of the epoxy. Conduct a moisture test using a moisture meter to ensure the floor is dry enough for the epoxy installation.
By following these surface preparation steps, you can ensure that your epoxy flooring in the bathroom adheres properly and lasts for a long time.
Slip resistance is an essential characteristic of epoxy flooring, particularly for bathrooms. Epoxy flooring offers excellent slip resistance, making it a safe and secure option for your bathroom. The smooth and seamless surface of epoxy flooring provides a stable footing and helps to prevent slips and falls. To further enhance slip resistance, anti-slip additives can be incorporated into the epoxy flooring.
It is crucial to consider the level of slip resistance required for your bathroom, taking into account the users and the amount of water exposure. For bathrooms with elderly or mobility-impaired individuals, or those with frequent water exposure, epoxy flooring with a higher slip resistance rating is recommended. Slip resistance can be measured using various methods, such as the coefficient of friction (COF) or the slip resistance rating (SRR).
When choosing epoxy flooring for your bathroom, it is advisable to inquire about the slip resistance rating or COF to ensure it meets your safety requirements. Additionally, regular cleaning and maintenance of the epoxy flooring will help preserve its slip-resistant properties. If you are unsure about the appropriate slip resistance level for your bathroom, consulting with a professional flooring installer who can assess your specific needs and provide suitable recommendations is highly recommended.
When considering the use of epoxy flooring in your bathroom, it is important to be aware of the potential for moisture trapping. Excess moisture can seep into the flooring material and cause damage over time.
| Factors | Impact |
| High humidity levels | Increase the risk of moisture getting trapped in the flooring. |
| Poor ventilation | Can lead to moisture buildup and increase the potential for trapping. |
| Improper installation | If the epoxy flooring is not installed correctly, there may be gaps or seams that can trap moisture. |
| Lack of maintenance | If the flooring is not properly cleaned and maintained, it can become susceptible to moisture trapping. |
To mitigate the potential for moisture trapping, it is crucial to ensure that your bathroom has proper ventilation and that the epoxy flooring is installed correctly by a professional. Regular cleaning and maintenance will also help prevent moisture accumulation. If you live in an area with high humidity levels, you may need to take additional precautions to minimize the risk of moisture trapping.
Yes, epoxy flooring is suitable for bathrooms due to its waterproof and moisture-resistant properties. It provides a protective layer that prevents the formation of mold or mildew. Epoxy surfaces are also naturally anti-bacterial, making them ideal for germ-prone areas like bathrooms.
Epoxy floors offer numerous benefits for bathroom use. They come in a wide array of colors and finishes, allowing for infinite design options that mimic the look of marble, stone, glass, or paint. Epoxy is also highly durable, resistant to chemical spills, and easy to clean with just a damp microfiber mop and optional soap or all-purpose cleaner.
While applying epoxy to a bathroom floor is a quick and DIY-friendly process similar to a paint job, professional installation is often recommended for best results. Specialists can ensure proper floor preparation, optimal adhesion, and the addition of a slip-resistant top coat for enhanced safety.
Yes, it is possible to apply epoxy flooring over existing bathroom tiles. The tiles should be thoroughly cleaned, degreased, and roughened with sandpaper before applying a special epoxy primer for better adhesion. The floor should be leveled with levelling epoxy after the primer has cured to achieve a seamless finish.
Yes, epoxy flake flooring is a great option for bathrooms. It is durable, water-resistant, and comes in various colors and styles, allowing for customization to complement any color scheme. The flooring has built-in grip adherence, making it safe to walk on when wet. It is also waterproof and stain-resistant, making it ideal for bathroom use.
Cleaning and maintaining an epoxy bathroom floor is easy. It only requires a damp microfiber mop and optional soap or all-purpose cleaner. The epoxy surface is naturally anti-bacterial, anti-fungi, and anti-mold, making it easy to keep the bathroom germ-free. Adding a slip-resistant top coat can also enhance safety and prevent accidents.
We Aim To Reply To All Enquiries With-in 24-Hours